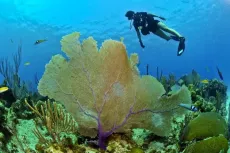

My dive guide finned quickly down the sandy slope and I kicked hard to keep up with him, my heavy camera and strobes creating quite a drag, slowing me down. By the time I reached the sea fan, in front of which he had stopped, I felt a thrill of excitement. I knew what he had found!

Contributed by
Factfile
Kate Jonker is an underwater photographer and writer based in South Africa.
She teaches underwater photography, is an assistant instructor and dive boat skipper for Indigo Scuba in Gordon’s Bay and leads dive trips across the globe.
For more information, please visit: katejonker.com.
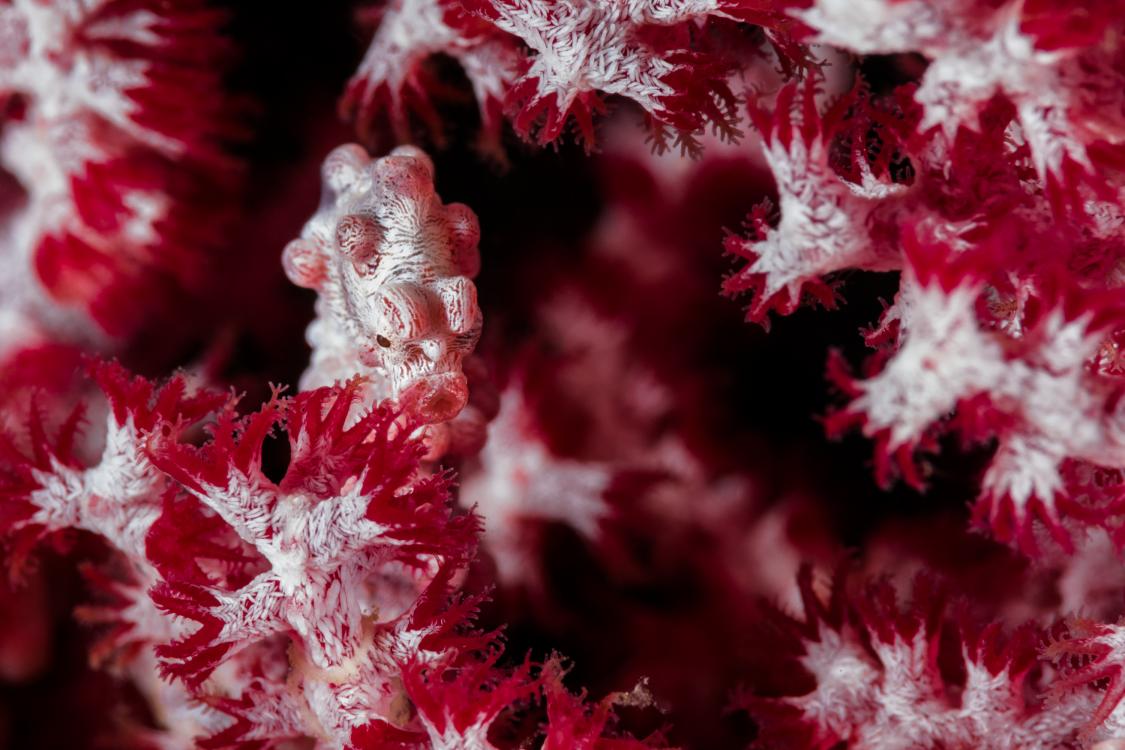
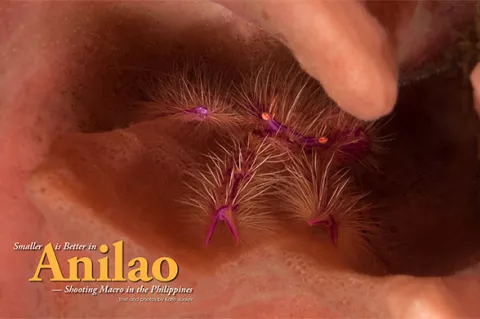
Peering through my viewfinder and trying to stay calm, I followed his pointer downwards, and right there, at its tip, was my first ever pygmy seahorse. It was tiny—much smaller than I had expected—but this was Anilao, and I was starting to realise that “smaller is better” in this marine-diverse diving destination.
I had reached a stage in my underwater photography journey in which I wanted to do more than just take photos—I wanted to create works of art! I had chatted to friends who recommended a photo academy in Anilao in the Philippines that would revolutionise the way I thought about underwater photography. I did my research and was hooked. Within a month, I was on my way, accompanied by my husband and two diving friends who were non-photographers.
Getting there
After a 23-hour flight from Cape Town, we arrived in Manila—capital city of the Philippines—and were soon heading down the highway to Anilao. I was amazed at how busy and congested the roads were. Everyone seemed to be driving something, whether it be a car, a motor bike, a motorbike-come-taxi or a jeepney, which is the Philippines version of a bus that the Filipinos seem to love decorating—the more flamboyant, the better.
We eventually arrived at our destination. Anilao Photo Academy (or APA, as it is fondly known), is the brainchild of renowned underwater photographer Tim Ho. Run by a team of incredibly talented underwater photographers and dive guides, APA is widely recognised as the place to go to for underwater photography, and caters for photographers of all levels and camera types.
Once unpacked, we set up our cameras and watched as the sun set over the ocean, changing from orange, to red to purple. We were in paradise!
Diving
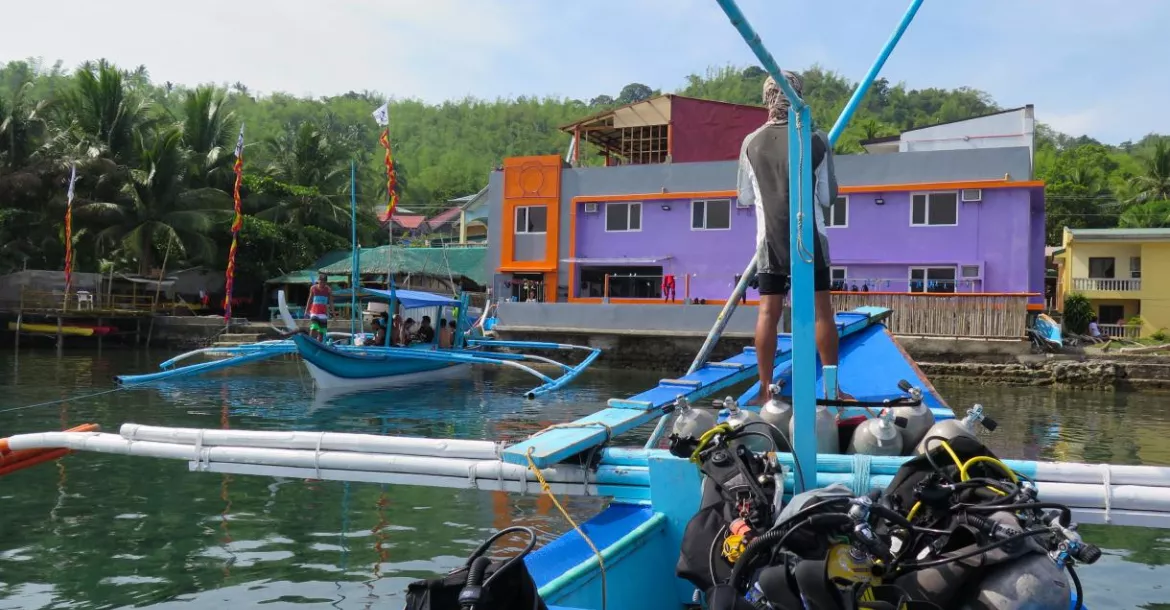
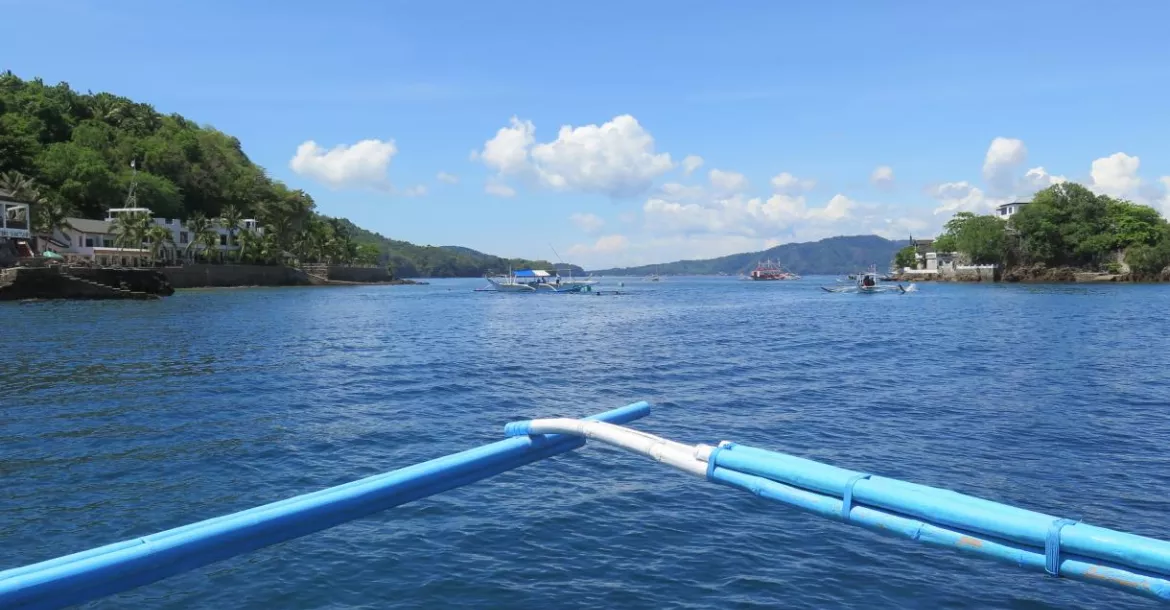
Early the following morning, we excitedly boarded our boat for a day of diving. In the Philippines, diving is done from bangkas. These are long, narrow wooden vessels with two support floats made from thick bamboo poles on either side of the main hull. They are usually motored by reconditioned truck engines.
Our gear had already been put safely on board, along with enough cylinders for three dives and our food and drink for the day. To climb on board, you simply walked a few metres across the beach and up a gangplank. For those (like myself) with a poor sense of balance, there is always a helping hand to make sure you climb aboard safely.
Before the trip, I had been concerned about how I was going to protect my camera on the boat. I need not have worried at all, as our cameras were treated like royal babies. They were carried carefully to the boat by the staff, who then put them on a special rubberised mat in the most stable and shaded part of the boat and then covered with towels for protection.
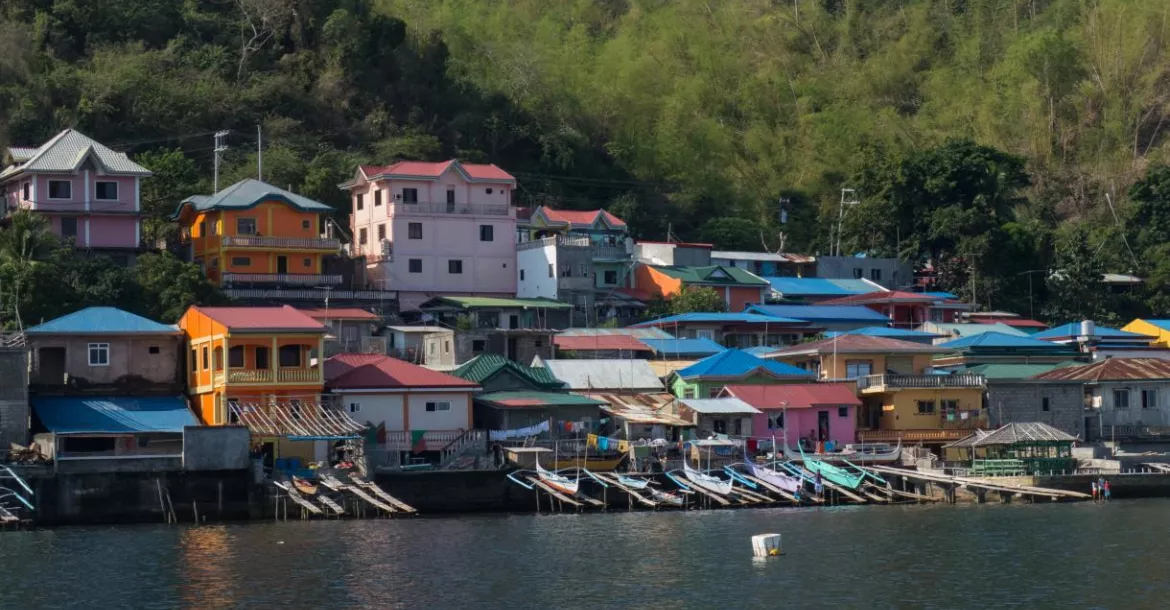
Once on board, we posed for the obligatory “selfies” before whisking across the mirror flat, indigo water to our first dive spot. We hugged the coastline, passing vibrantly-painted yellow, purple, red and green homes and large resorts, interspersed by steeply sloping, lush, tree-covered hills that reached right down to the waters’ edge.
Koala. Our first dive was at Koala, named after an Australian who had had a house on the shoreline nearby. The bangka crew dropped anchor, and we kitted up and rolled backwards into the clear, warm blue ocean. The crew then gently passed our cameras down to us. There were just the four of us on the bangka, accompanied by two dive guides: Ivan, who is an accomplished underwater photographer and amazing spotter (and soon became my buddy on the trip); and Doods, who was also an eagle-eyed spotter.
Most dive sites in Anilao comprise shallow coral gardens with sandy slopes interspersed with coral outcrops, rubble-covered slopes, or gently sloping sandy bottoms. The bangkas anchor shallow and close to the shore and after entering the water, we would usually swim down to the deepest part of the dive site and then slowly make our way shallower.
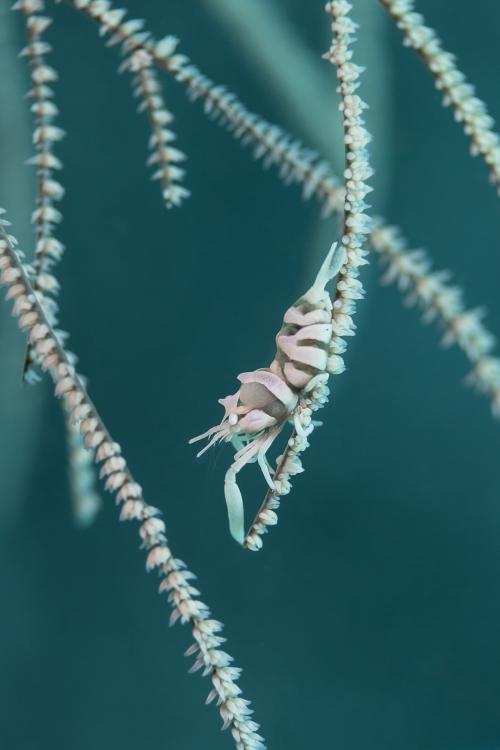
I followed Ivan down the reef, and before long, he was beckoning me over to a small green plant, where he pointed to something so tiny it was not visible to the naked eye. Peering through my camera’s viewfinder, I saw a tiny creature that looked like a two-millimetre-long praying mantis and realised it was a skeleton shrimp!
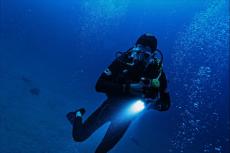
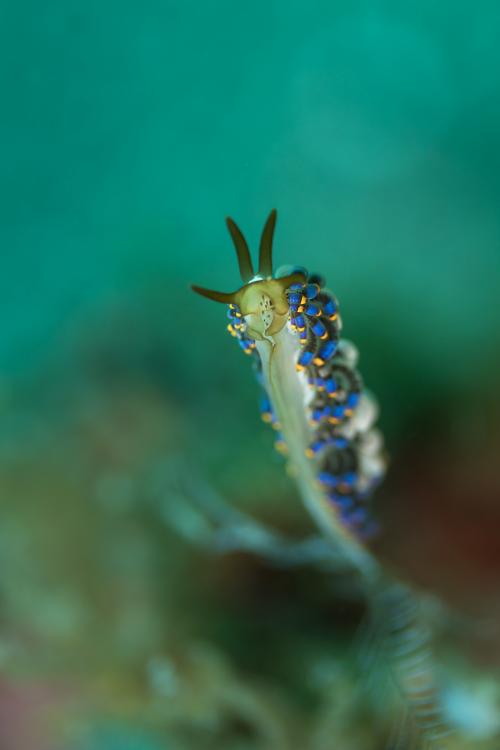
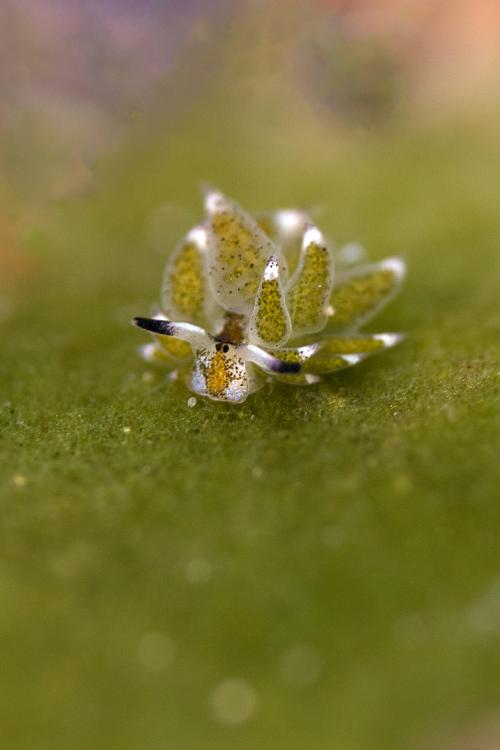
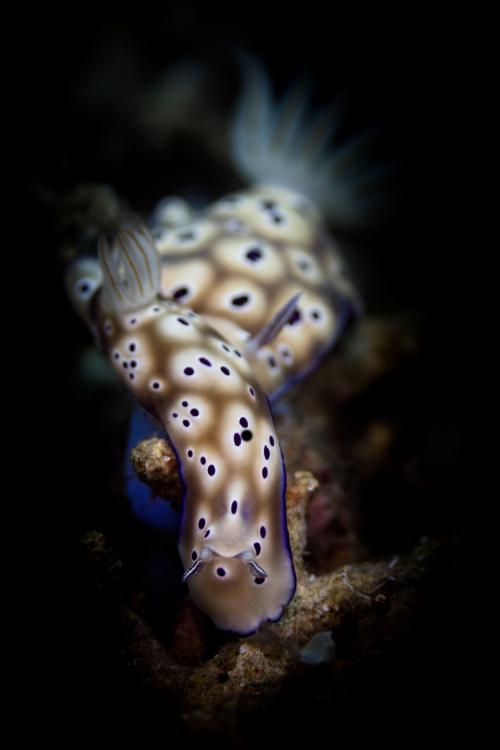
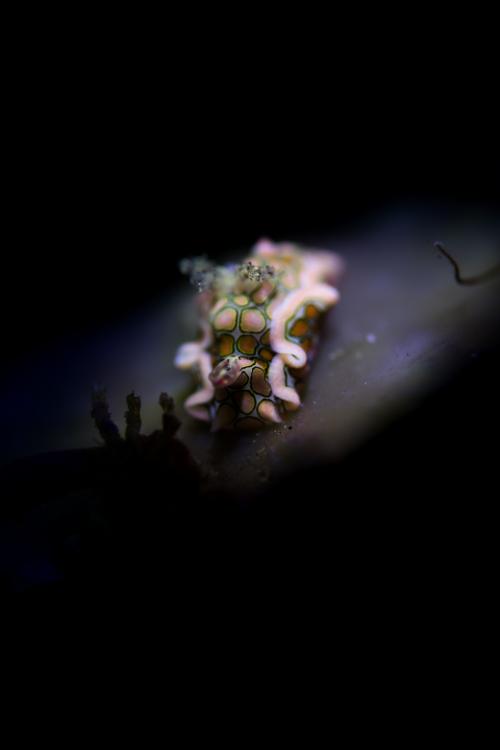
Before long, I began to realise how tiny the critters were. At home in Cape Town, our nudibranchs average 3cm to 5cm. Here, the dive guides were constantly searching for smaller and smaller critters for us to photograph. Most were minuscule and I was very glad I had purchased a +12.5 magnifying dioptre for my camera before the trip, as this helped to photograph even the tiniest of creatures.
After our first dive, we surfaced at the boat, handed cameras and fins up to the crew and climbed up a sturdy wooden ladder back on to the boat. Once on board, we were offered fruit and crackers, water, coffee, tea and ginger tea. We then relaxed in the sun and chatted excitedly about what we had seen.
Dakeda. After staring longingly into the clear blue water at the shallow reef below us, our surface interval was finally over and we moved on to Dakeda. Here, we were met with completely different underwater topography—a rubble slope. There were just dark brown boulders everywhere. No coral, no reef, no sand. No life! Had the recent earthquake covered everything up, I wondered to myself. Just then, Ivan called me over and scribbled some instructions on his underwater note pad, and I quickly reset my camera and turned off my strobes, wondering what was going to happen next.
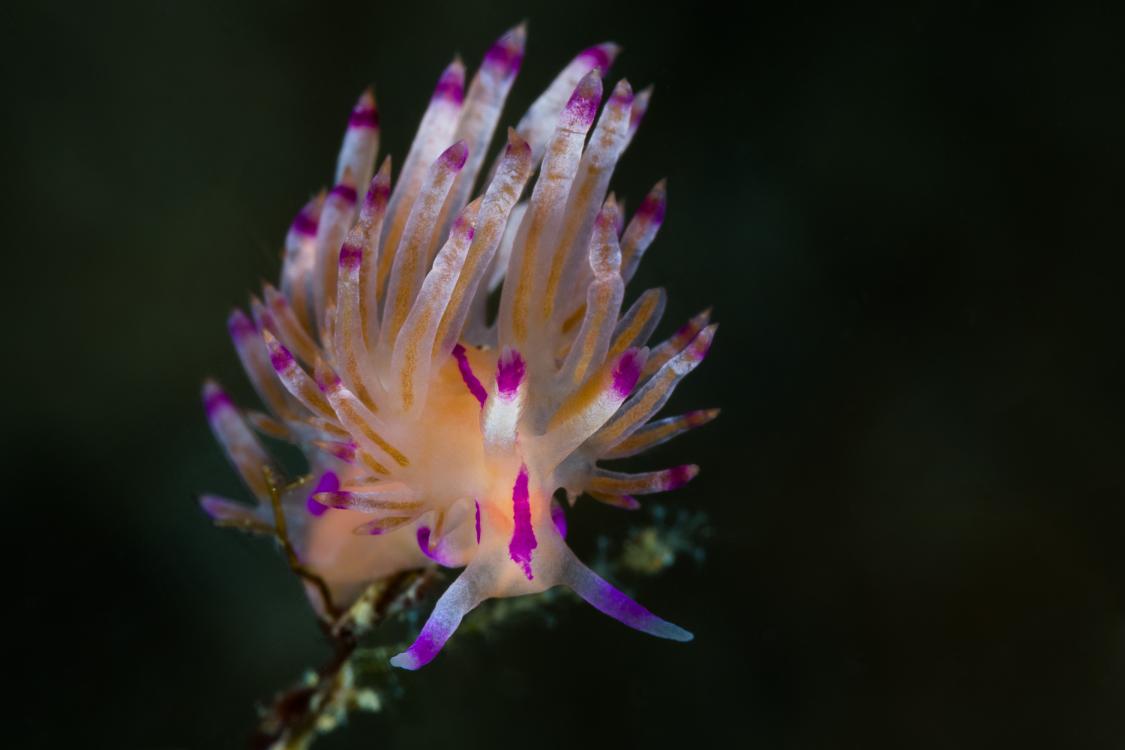
He pulled out a narrow beamed torch and pointed it at one of the most beautiful nudibranchs I had ever seen, its yellows and purples in stark contrast to its dark brown rubble surroundings. I took a photo and as I was doing this, saw that the nudibranch was lifting its mantle up and down. Every time it did this, Ivan would say “click” loudly and I would press the shutter. With much laughter, we soon got into the swing of things and I got one of my favourite photos ever. I call it the Marilyn Monroe nudibranch. After that, the critters just kept on coming. I was absolutely blown away—this was the famous muck diving I had heard so much about. I loved it and I was hooked!
Sadly, all too soon, we had to return to the boat. It was lunch time, and we had the most delicious hot lunch awaiting us. Rice, vegetables, beef in spicy sauce and more fruit. After eating heartily, chatting eagerly about our amazing muck dive and laughing some more about “Marilyn Monroe,” we rested impatiently before our third and final dive of the day.
Basura. Our third dive was at Basura, a sloping sandy site littered with coral bommies and rubble. We were getting into the swing of things now. Our dive guides would find critters for us and call us over to photograph or look at them. As we approached, they would show us the direction we should come in at to be lined up to take the best shots. If the critters were really small, they would use a pointer to point down at the subject, making them easy to find. If we struggled to find the tiny critters with our dioptres, they would gently lift our ports until they were pointing directly at the subject. We were never rushed, but encouraged to take photos until we were happy with the results, and only then did they allow us to move on. By the end of the third dive, we were all in sensory overload, having never before seen so many new and exciting critters in just one day. Even our two non-photography buddies were having a wonderful time.
Après dive
After our dive, we headed back to home base where we washed our gear and photographic equipment, showered and prepared our cameras for the following day. By the time our chores were completed, the sun was setting and we chatted about our day over ice cold local beers.
Dinner was a jovial affair, with divers from around the globe chatting about what they had seen and photographed, sharing photo ideas and discussing techniques. We then went through our photos from the day and tried to identify what we had seen in the huge library of identification books.
Daily routine
We soon fell into a routine: Wake early, drink coffee, have breakfast and board the boat at 8:00 a.m. for a day of diving. We would then return, rinse gear, prepare cameras for the next day, drink a couple of beers, have dinner, chat photography, try to identify all the amazing critters we had seen during the day and fall into bed.
Over our week-long stay in Anilao, we dived 20 different dive sites, some more than once. The macro life was incredible, and every day we discovered new fish, new shrimps, new nudibranchs and new photography techniques. We even “went wide-angle” one day, and explored Ligpo Island, with its huge pink barrel sponges, vibrant yellow soft coral trees and an area carpeted in anemones with their resident clown fish. Simply beautiful!
Helpful tips
I had travelled to Anilao to improve my photography and within the first couple of days, I had learned so much more than I had ever hoped to. Below, I share some tips from the trip.
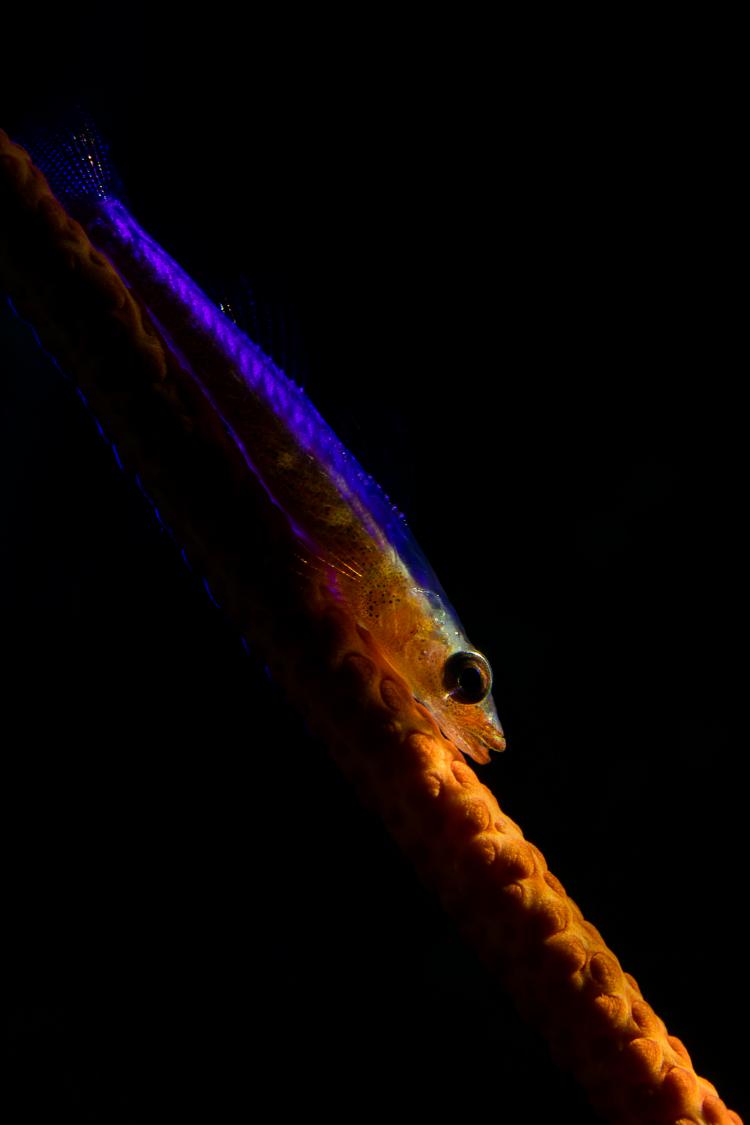
Tiny critters. The photos you see in magazines, books and social media do not prepare you for the size of these critters. One expects them to be quite large, but in reality, most are really tiny! Take pink-eyed gobies, for example. I had thought they were about 5cm long. The ones I saw and landed up shooting were about 0.5cm long, and boy, did they move around a lot. It was challenging, it was fun and incredibly addictive. You need to be patient and you need to take your guide’s advice and follow his pointer.
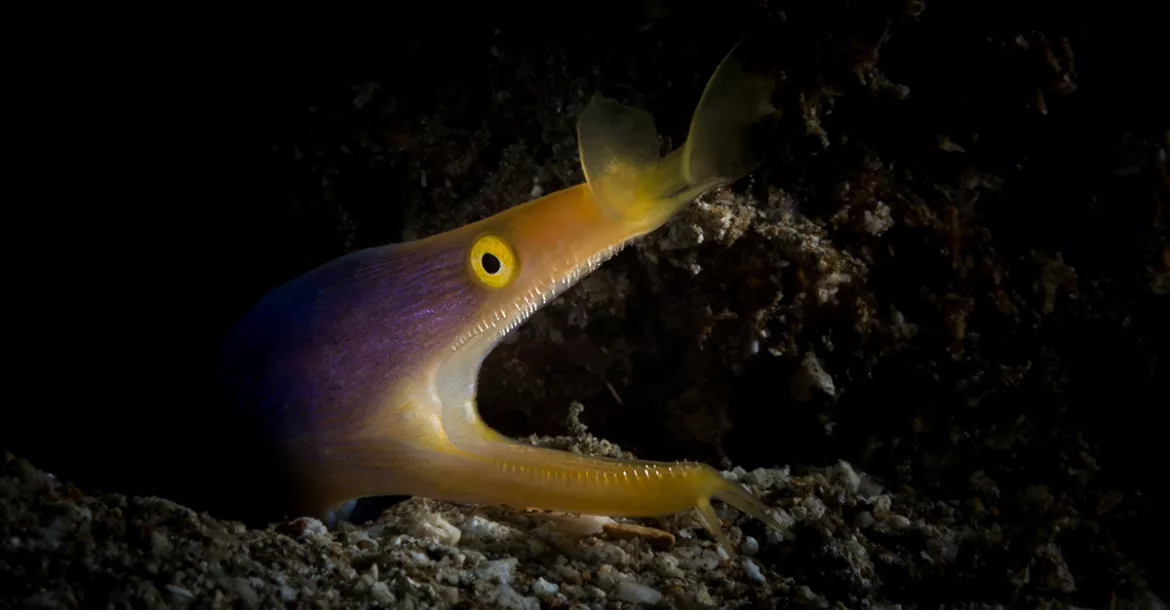
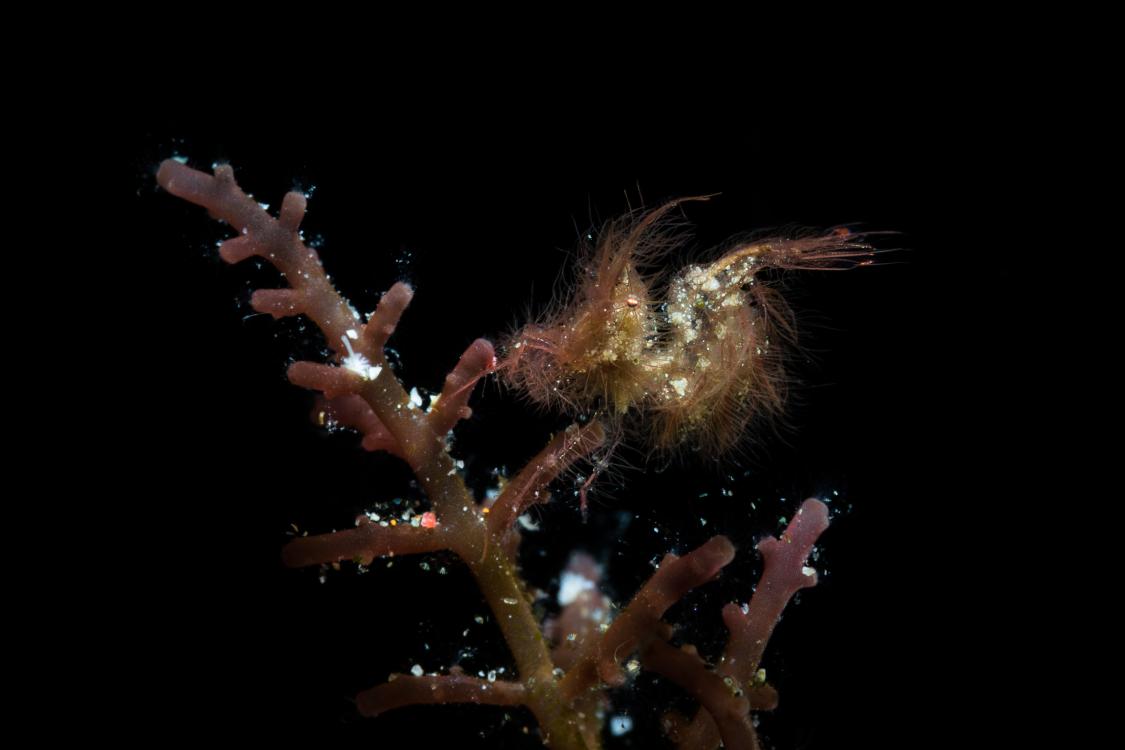
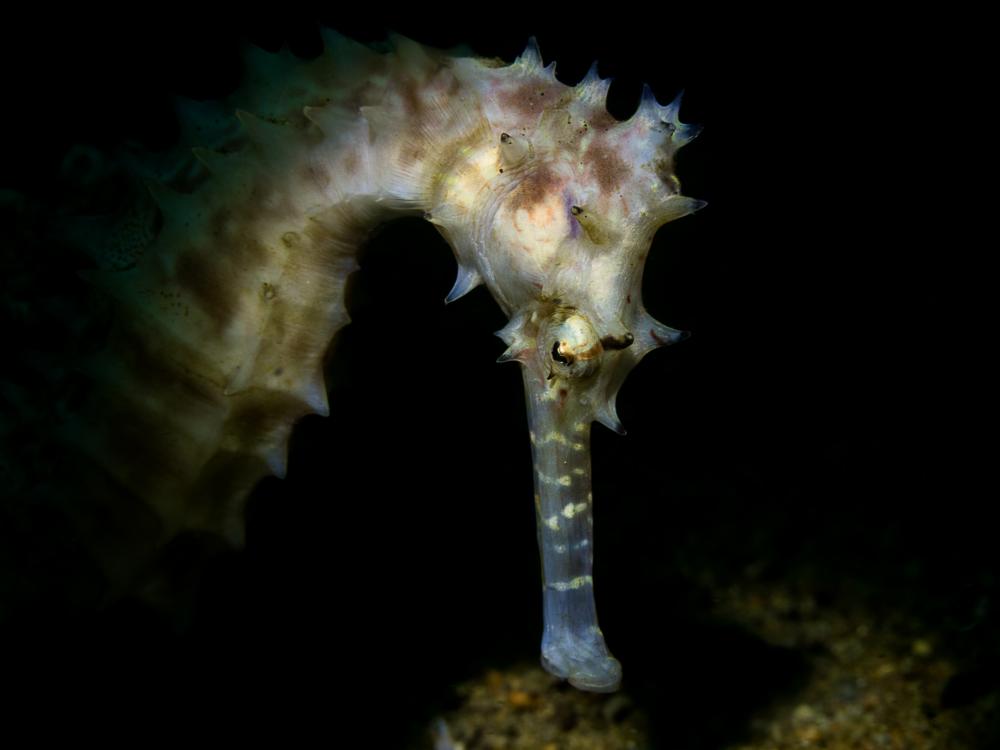
Magnifying wet lenses. Do not even consider going to Anilao unless you have a strong magnifying wet lens (often called a dioptre) for your camera. Many of the critters are mere millimetres in length, especially the skeleton shrimp, pygmy seahorses, hairy shrimp and many of the nudibranchs. I used my +12.5 dioptre wet lense most of the time, and the majority of other guests seemed to be using them too.
Flip dioptre holder. As some of the critters are too large for a dioptre, I would also advise getting a flip dioptre holder with a 67mm thread. One flap screws on to the front of your port and the other flap attaches to your wet dioptre. You are then able to flip it open when you do not need to use the dioptre, and close it again so that it is in front of your port when you do. This means you do not need to waste time screwing the dioptre on and off the port during a dive, thus reducing the chance of losing it, too.
Back button focus. This is a great feature of DSLR cameras, most mirror-less and some compact cameras. It is particularly useful when using magnifying wet lenses, which result in a very shallow focal plane. It works by removing the focus function from your shutter button and allocating it to a button on the back of your camera. You then use the back button to lock focus on the critter and move the camera in and out millimetre by millimetre, pressing the shutter when you see your subject is in sharp focus. This makes it much easier on your shutter finger, as you will no longer need to hold your shutter half-pressed to keep focussing as you take your photos. When you move on to the next subject, you can use the rear focus button to lock focus on the new critter.
Magnifying viewfinder. I discovered that if one is taking photos of such tiny critters, a magnified viewfinder that can be attached to the back of your housing really gives you a better view of what you are shooting. Both 180- and 45-degree viewfinders are available, and after the trip, I invested in a 45-degree viewfinder. Its magnified view now helps me determine whether my subject is in focus and aids in composition of shots. Looking slightly downwards and getting used to pointing the camera at a different angle did take a bit of getting used to, but in the end, it was great—and a lot easier on my neck, too.
Research beforehand. A piece of advice I would give anyone travelling to a new destination—especially to take photos—do your research, look at photos, watch videos. Know what to expect. If you know what critters you will be seeing, find out what they look like, what their habits are, whether they carry eggs and where they can be found. Think of the best angles and lighting for that particular creature and how you could position your strobes to bring out its textures or main features. A bit of background knowledge paired with the incredible expertise of the dive guides will help you get the most from your trip.
Spotting the critters. If you struggle to see the small stuff and use reading glasses on land, invest in a mask that has special magnifying lenses that help you see tiny critters underwater. If you already wear contact lenses and need to wear reading glasses as well, investigate bifocal or concentric contact lenses that have both your near and far prescription worked into them. I have recently done this and can now spot the really tiny critters that live on the reef.
Hold steady. Buoyancy is incredibly important when taking macro photos. In Anilao, there was very little surge or current, making it relatively easy. You will either need to hover above your subject or prop yourself up by placing two fingers on your left hand on a bare piece of rock or sand. Whatever you do, it is vital that you first check that there is nothing close by or under the sand that you could damage, or that could injure you.
Pointers or muck sticks. Although I have a pointer, I have never used it. Many people use them to prop themselves up on the reef or on the sand whilst using their other hand to operate their camera. They are also used to point out critters to fellow divers or to bang on cylinders for attention. I thought that this trip would be the ideal place to test mine out, but I found that it just got in the way and never used it again after the first day. Many people use them with success.
Afterthoughts
After our trip, I returned home feeling inspired and rejuvenated, with so many new ideas to try out. The huge diversity of marine life in Anilao is incredible, the diving is easy and the people are welcoming and friendly, making this an equally enjoyable destination for photographers and non-photographers alike. ■

 wreck site by The Lost 52 Project.")


 underway off Hawaii with lifts lowered, July 1944")


")


, on 27 October 1943")


")