I started cave diving in Italy in 1990. At that time, the rules were very clear, codified and related to the kind of caves that were encountered in my region. Very often, they were resurgences with current (sometimes strong) or sumps inside caves, with water ranging from crystal clear to the color of coffee and variable visibility, depending on the rains. After years of cave diving, having acquired a certain level of experience, I thought I knew “the whole panorama” of cave diving procedures. But then I got involved in a new project in 2017, when I decided to move to Mexico to live and work there.
Contributed by
Factfile
First certified in 1987 with NAUI, Massimo Ardizzoni is an avid cave and technical diver, NAUI Course Director and TDI Technical Instructor based in Mexico.
He served as a volunteer technician and team leader for CNSAS (Corpo Nazionale Soccorso Alpino e Speleologico) and as a professional dive instructor for major dive tour operators in the Egyptian Red Sea, where he began using rebreathers, starting with Powerbreathe’s Infinito IAMT 444 and many other models since then.
He opened his own dive center OceanoMare (focusing on technical dive courses), which became an important Sicilian center for deep diving, trimix, deco gases, rebreathers and cave diving. In winters, Ardizzoni worked for a premier Italian dive tour operator in the Maldives, where he developed the use of rebreathers and technical diving on site.
He soon started using sidemount, before it was known in Sicily, and during his years in the field, he dedicated his time to deep diving on wrecks, exploring new wrecks and revisiting known wrecks, where he photographically documented everything.
He has contributed to several photographic books on Italian underwater wrecks as well as video documentaries on unpublished wrecks and has assisted the Soprintendenza del Mare (government office for the protection of archaeological properties) in Sicily for the protection, study and enjoyment of important underwater archaeological sites in Italy.
He also contributed to the revision of the first underwater Italian manual for technical diving with trimix mixtures for rebreathers (mixed gas CCR), and wrote articles for NAUI’s magazine, Sources.
In 2017, Ardizzoni moved to Quintana Roo, Mexico, working under the Deep Bubbles brand, focusing mainly on knowledge, training, discovery, protection, documentation and exploration of Mexican cenotes, with various equipment configurations.
Once I arrived in the Yucatán Peninsula—more precisely, in Quintana Roo—I started working as a guide and dive instructor (an occupation in which I had been practicing for over 20 years). I realized that much of the knowledge and procedures in caves, which I had acquired over many years, had almost no value here, because the needs in Mexican cenotes were not very compatible with the needs of “my” Italian caves.
I tried to make a comparison between the various major training agencies which offered cave training, and talked with various friends and colleagues. I realized that, in reality, the general guidelines and basic rules were very similar to each other. But as far as procedures for navigation protocols were concerned, there was an aura of uncertainty, because many, if not all, notions were left up to the experience of the instructor and the place where the instructor dived.
This sort of “confusion” has prompted me to write this article—to try to describe clearly what methods of navigation we use here in the Mexican cenotes. The topic is important because the cenotes attract thousands of cave-diving fans all year round, from all over the world. This article is also the result of the fact that, while going to the caves, meeting cave divers of different nationalities and backgrounds, I often found myself discussing and/or adopting different protocols from those I was used to. It must also be said that the Mexican cenotes are a world onto themselves, with their own peculiarities and “difficulty” in diving; therefore, one has to have clear ideas on how to deal with this kind of diving.
Cenote characteristics
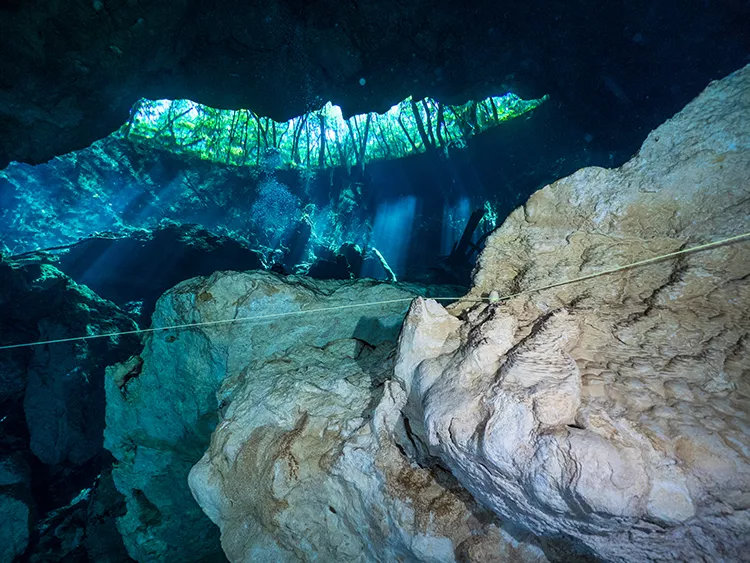
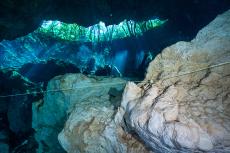
There are several factors that contribute to making diving in the cenotes quite “confusing.” Foremost of all is certainly their labyrinthine formations, which make each cenote a maze in which one can get lost—an easy thing to do if you do not observe the right navigation protocols. Often (almost always), cenotes do not have consistent currents; therefore, divers accustomed to following the flow of the current (as in the caves of Florida) to guide one’s exit, must realize this is an inapplicable method in the cenotes.
Another characteristic of the Mexican cenotes is the presence, in some cases, of unusual entrances and exits. If what is considered the cave’s exit is actually a tiny hole in the limestone rock in the middle of nowhere in the jungle, it does not mean that it is passable and/or usable, so it should not be considered a viable exit for safety reasons.
For those unfamiliar with Mexican cenotes, you will soon realize that navigating them is quite complex, precisely because there are different rules here than those found in the rest of the world. In addition, there is a problem with visitors frequently making changes to guidelines in the cenotes, moving line markers, and adding or removing intersections to various T’s or jumps, without alerting the cave diving community. All of this, of course, generates further confusion.
It can also happen that during the navigation of a cave, the line markers change direction and start pointing inside the cave, because they are indicating another closer exit but not necessarily an easier or more direct one. In fact, to reach these exits, sometimes you have to pass some major restriction, which is not feasible for everyone, or you have to make one or more jumps to reach this “nearer” exit.
It may happen that you will find, on the main line, double line markers, indicating the same direction, which, in other geographical regions around the world, often indicate the presence of a jump, but in a Mexican cenote, may indicate the nearest exit, in some cases, or a jump of particular importance. Sometimes, you may be looking for a hidden jump, which is not marked on the main line in order to protect sensitive or fragile areas. In the Mexican cenotes, there is almost a complete absence of distance markers—although, you may find some in a few cenotes that have been explored.
All of these factors contribute to creating a feeling of “insecurity” in those who “adventure” into the cenotes without proper knowledge of the caves and their rules. That is why it often becomes important to rely on local guides who can help you safely dive the cenotes or give you valuable advice on the spot. The fact that I have a better understanding of them now, and that I can transmit this information to whoever comes to dive the cenotes for the first time, is precisely the reason why I recommend that divers should never trust the markers present in a particular cave, but to rely only and exclusively on their own personal markers, and use those of the cave only as auxiliaries.
This is also true because a cave dive must always be planned first on the basis of a technical map, or contour map, and once in the water, one needs to know how to orient oneself with a compass and any natural references inside the cave. In general, make sure you plan properly; when in the water, be vigilant and pay attention to navigation; use your markers; take notes (mentally, or better yet, written) of the time and gas consumption required to reach a certain point, such as a T-junction or a jump; return by the same path from which you came—and all your dives will be fun and safe.
In Mexico, jumps on the main line are generally marked with a single line marker, and the connecting line can be 20cm away, or in some cases, even 10m to 13m away! Several cave diving guides and instructors encourage the use of these markers for tying your spool and making the jump. In my opinion, it is always best to place your own custom directional marker and tie the spool to it. In this way, regardless of visibility conditions and/or stress, recognizing your jump and its directional marker is easier.
Consider this: Don’t blindly believe what you encounter on the line (main line, etc.), including line arrows, reference exit markers (REM), cookies, etc. They can be wrong (remember the human factor). Always follow your own navigational plot and your own markers—never follow the markers of other cave divers! They may come from another direction, or they may be wrong.
Types of markers
During a dive in the cenotes, you can find different kinds of markers:
Arrow or Line Arrow (unidirectional marker)
These line arrows may be of different colors, shapes or sizes, but they always uniquely mark a direction. In the beginning, there was a similar concept developed by Lewis Holzendorf, who made line arrows with cut tape. Later, they were perfected and manufactured by Forrest Wilson, in the form we know today (https://en.wikipedia.org/wiki/Line_marker).
Line markers ALWAYS indicate the direction of the exit and are normally always placed at a jump, gap, end of line or T. You can choose to use line markers of different colors, depending on whether the cave has very dark or very light limestone. The important thing is that they are clearly visible, marked with your name and customized, so you can recognize them by touch (in zero visibility), even with gloves on. When you buy them, check if they are positively or negatively buoyant in fresh water. It is better to have a negatively buoyant marker, so that when you drop it, it goes to the bottom, so you do not risk losing eye contact with the line. Imagine using one that floats, which slides away, upwards—what could go wrong?
Cookie (non-directional marker)
A cookie is used to mark a specific place on the line but does not give any information about the direction. Cookies are used to identify a person or a team, or to reference an exit or a direction. They are often used to mark circuits (loops) and traverses, to understand where one has arrived. These also need to be customized and marked with your own name. Cookies were invented in the ‘90s by Daniel Riordan, a famous cenote explorer and active Full Cave instructor.
Reference Exit Marker or REM (directional marker)
The REM is a directional marker that always indicates the direction of exit, as it has a shorter and a longer side. On the longer side, there is also space to write some notes. Usually, these markers are used during exploration, lost-diver procedures, or as personal markers instead of cookies or line arrows. These also need to be customized and marked with your own name. The REM was invented by the late Bill Phillips, a Full Cave instructor, and above all, an avid explorer of the cenotes in Mexico.
How to use markers
At the start of a cave dive, the first two tie-offs or anchor points of the line (the primary and the secondary) are made as follows:
The first tie-off is tied within three turns from the entrance, in open water, if possible, and at a depth of 3m. The second tie-off is tied within the next two turns and possibly at 6m depth. The various turns of the ties (tie-off) serve to provide more safety in case of possible breakages, while the depths serve as a reference in case of decompression (programmed), or a possible safety stop, even with zero visibility.
Connect your line (usually a primary reel or spool) with the cave line, also called the permanent line or main line. There are different ways to connect them, depending on which country you dive in. But generally, these are the classic examples:
If you are in the first team to enter, you can connect your primary reel directly to the main line (as in Example 1). But it is usually preferable to make a 90-degree connection before the main line (see Example 2) to prevent the primary reel from sliding on the main line. If there are system markers (line arrow) on the main line, avoid connecting your primary reel to the main line. Mind you, it is not a procedural error simply if the line marker points in other directions, but it could cause confusion in case of zero visibility output, or you could mistakenly disassemble it on output. Once you have tied the primary reel (or spool) onto the main line, ask the team to confirm it, and they will check it and give the OK to continue. Each team member then places his or her own cookie or REM (marked and/or customized) before the carabiner. In this way, each team member communicates to the whole team, confirming his or her presence.
See Example 3 for another way to tie your primary reel onto the main line. Usually, this system is used by other teams that enter after the first one. This way, you avoid interference with the various lines. The whole team has to confirm their presence with personal markers and check that everything is OK.
Connect your line from the cavern line to the main line (cave line). Sometimes, to reach the main line of the cave area, you have to navigate along the cavern line. Once there, place your directional marker indicating the shortest exit and connect to the main line as in the previous examples. Ask for confirmation from the team, who will verify, check and give the OK to continue. Each team member must confirm their presence with their personal markers. (See Example 4).
T or permanent connections
NEVER pass a T without placing your marker first!
Continuing our progression underwater, during navigation, we may encounter a T, which is simply a permanent connection with two or more lines, and you can find it in any part of the cenote such as a secondary cenote exit, an important tunnel, a crossing to another cenote, etc.
When you get to a T, the first thing to do is to place your personal marker BEFORE the T. It can be a REM, indicating the exit, or it can be a cookie. So, ask for confirmation from the rest of the team, who will verify, check and give the OK. ALL must check their gases.
On the way back, when you arrive at the T, the team leader will ask the team to confirm the exit direction, and the team will verify, check and give the OK. There are special situations, which can arise, in which you have to swim through a very thick halocline, which may become a distraction, so you do not notice the T (i.e. in the case of white rock and a white line), you pass over it and you’re done! In this case, you have put yourself in an extremely dangerous situation, with an unmarked T, in the thick halocline, with your gas starting to get low. Some T’s are marked with a line arrow indicating the exit direction. But this is not always the case, and it is always better not to trust what you find on the main line. (See Examples 5 and 6). For some examples of different T’s, see Examples 7, 8 and 9.
Jumps
NEVER pass a jump without having it marked and connected!
The Mexican cenotes never have a single tunnel (as sumps usually do). They are labyrinthine. So, it may be the case that to reach different parts of the cave, you have to take secondary detours (compared to the main line) that are not connected, these are jumps. Normally, in the cenotes, almost all the jumps are marked with a line arrow pointing towards the exit (see Example 10).
Sometimes, one may find two line arrows near each other, indicating the exit and the presence of a jump (see Example 11), or two line arrows touching their tips (see Example 12 on next page). But this is not common. It depends on what country you are in. In other cases, the jumps are not marked on the main line. This is done to protect a very fragile and delicate cenote area, or for security reasons, or for exploratory reasons (see Example 13).
If you encounter a jump marked by two line arrows and you are the first team member to arrive, you must mark your direction of origin and attach your spool between or onto one of the two line arrows (see Example 14), or use your own personal markers, which is always preferable (see Example 15). The rest of the team must mark their direction of origin on the main line and their presence on the spool.
The second team that arrives marks its exit direction and ties their spool onto the main line, after the first team. This is done in order to always give priority to the first team, which has to exit (see Example 16).
When you meet a single line arrow, you have to mark your direction of origin, then tie your spool onto the line arrow and connect to the new line (see Example 17), or use your own personal markers (both directional and not), which is always preferable. The rest of the team must mark their presence with personal markers (see Example 18).
Obviously, if you find an unmarked jump, you have to place your REM (or directional marker) and tie your spool (see Example 19). The same is true if you have to make an unmarked jump, on a parallel line (see Example 20). Then the rest of the team has to mark their presence with personal markers.
In some cenotes, the jumps can be very close to the main line—even just a few centimeters. In these cases, always use the same rules of safety and common sense and do not underestimate the “ease” of the situation. Always follow the main line until you get to the jump. Do not try to “shorten” the road. It is possible that a stalagmite, a column, a rock or something else can hide the view of the jump and make you connect onto a wrong line nearby.
Important considerations
When making a jump, only one spool (by the team leader) is used for each team. But each team member must mark his or her home direction on the main line and his or her presence on the jump with personal markers. When a jump is connected, the team leader will ask for confirmation from the rest of the team, who check and verify that everything is OK. ALL must check their gas.
On the way back, once on the jump, the team leader will ask for confirmation of the exit direction and the rest of the team must verify that it is correct and give the OK. As the cave divers cross the jump, each member must remove his or her personal marker and wait on the main line to reference the exit, so that the last member of the team can recover and rewind the spool, after which, the whole team will confirm the exit direction. In the case of separation of team members, everyone MUST always be self-sufficient to reach the exit.
The situation changes when you decide to use “Team Markers,” or group markers (instead of personal markers). You sometimes find “real stadium fans” of this method. In this protocol, the team leader places the markers for the whole team, both in the jumps and in the T intersections. The following divers will not have to do anything but check the positioning of the marker, eventually noting and confirming it among themselves.
Obviously, by doing things this way, less material is used, the main lines are less “crowded” with markers, and everything goes faster. It is a choice best left to the team’s most experienced cave diver or the cave dive guide/instructor. I personally prefer using personal markers, because, in any situation and circumstance, each diver is responsible for himself or herself, and at the same time, is independent from the rest of the group—a very important factor in case of a return with zero visibility or a lost diver. But, like everything else, these are personal choices.
Gap
You will find the gap when you arrive at the end of a line, at a possible exit, or in free water. In this case, if you want to continue farther, you have to connect this end of line with the continuation, which is usually on the other side of the possible exit or free water. The gap serves to prevent recreational divers from misunderstanding and following the cavern line and following the wrong line.
A primary reel, or gap reel, is normally required to perform the gap because of the long distances. To connect a gap, it is not strictly necessary to use markers, as there can be no navigation errors. It is an end of line. The procedures always remain the same: There is a gas check, then a request of confirmation by the team, who then check and verify that everything is OK (see Examples 21 and 22).
Halfway on the main line
When the length of the main line is equidistant from one exit side and the other exit from where you are, it is normally marked with two Line Arrows pointing in opposite directions. Place a marker in front of the first arrow to reference the exit, check the gas, ask for confirmation to the team, who will do the same thing, after the OK, go ahead (see Examples 23 and 24).
Line markers pointing in the opposite direction to your navigation
Sometimes, during navigation, you may come across one or more line arrows pointing in the direction of your navigation. This happens when you have passed the halfway point on the main line (not marked) and continuing, you find the exit of another cenote. In this case, before you pass the line arrow, you have to reference your exit direction with a marker, ask the team to confirm, then they do the same, check and give the OK to continue (see Example 25).
Nearest exit
During navigation, you may encounter a line arrow pointing towards you and two pointing in the opposite direction on the main line. In this case, the two line arrows indicate the exit, which is faster than the one you are on. But remember, they do not necessarily indicate the shallower and/or easier exit (i.e. restrictions, current, etc.). As in the previous situations, you must reference your exit direction with a marker, ask the team for confirmation, then they do the same, check and give the OK to continue (see Example 26).
Parallel lines
In some cenotes, you may encounter a line parallel to your main line. These two lines may be very close, but they do not touch or meet. In this case, it is highly recommended that you place a marker on your main line in order to avoid any navigational errors during an exit with zero visibility (see Example 27). ■

