There are several ways to create dramatic images when you are shooting photos underwater: strong compositions, compelling behavior, exotic subject matter and of course lighting.
Contributed by
Factfile
Mike Bartick is a widely published underwater photographer and dive writer based in Anilao, Philippines.
A small animal expert, he leads groups of photographers into Asia’s underwater realm to seek out that special critter.
Please visit: Saltwaterphoto.com.
When I considered buying my first snoot, I was searching for a way to up my photo game a little bit and to broaden the scope of my portfolio. Something that would help me to create stronger compositions and create better frame presence of my subjects—a way to help me assert more control over the image and a way to gain ground on new skills.
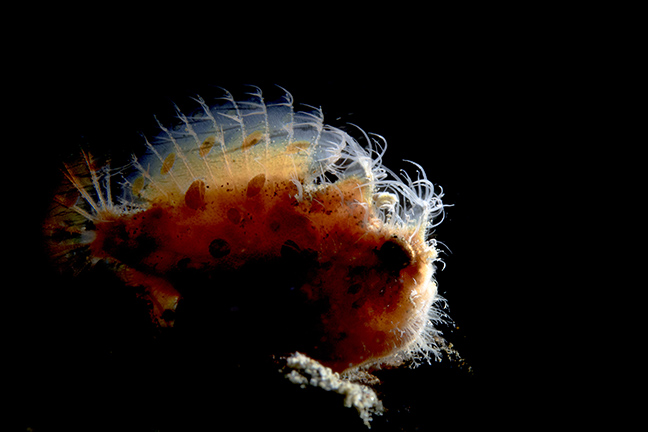
For years, I had been swimming over the sandy-sloped dive sites in places like Lembeh, Bali, and Anilao, to name a few, and shooting photos of the whimsical critters that can be found there. After reviewing my images from a trip, though, the photos felt flat—even when shooting something really exotic, like a blue-ringed octopus or a hairy frogfish.
I experimented at length with ƒ-stops, strobe angles, single strobe, dual strobe, lenses and anything else I could find. Then I saw a few images from a shooter that completely blew my mind, inspiring me to try something new. He was using a snoot at a time when no one else was using them, and after seeing those incredible images, I was hooked. The next step was teaching myself how to use one.
Using a snoot has become quite popular over the last few years. Some shooters have become so well adapted to using them that it becomes an exclusive way for them to shoot. While I love using a snoot in my own work, it is important to keep in mind that a strong portfolio should allow for many different methods of shooting, and that a snoot is not the answer for everything.
What is a snoot?
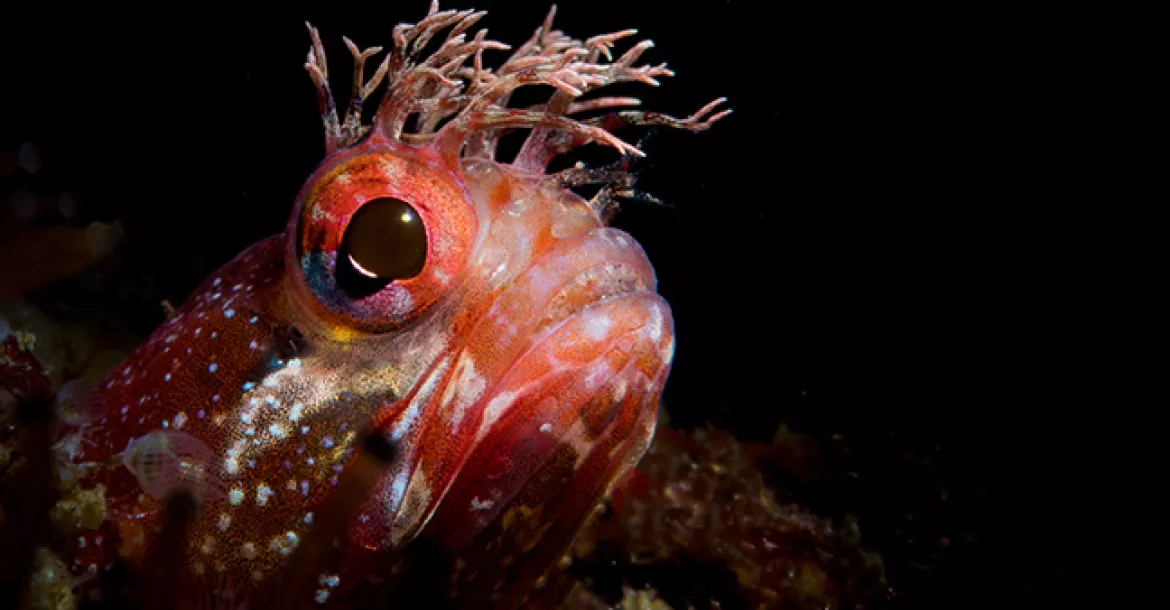
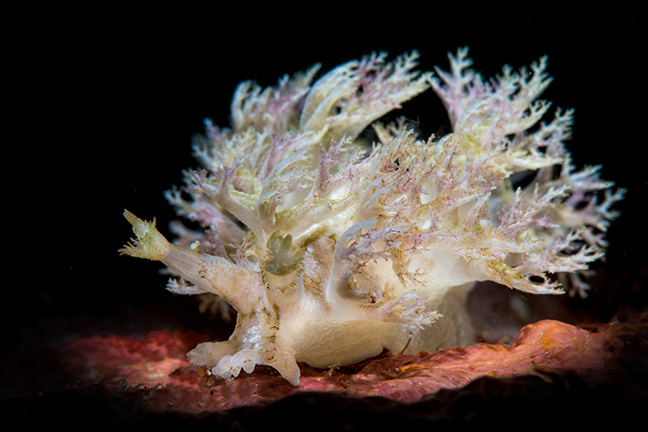
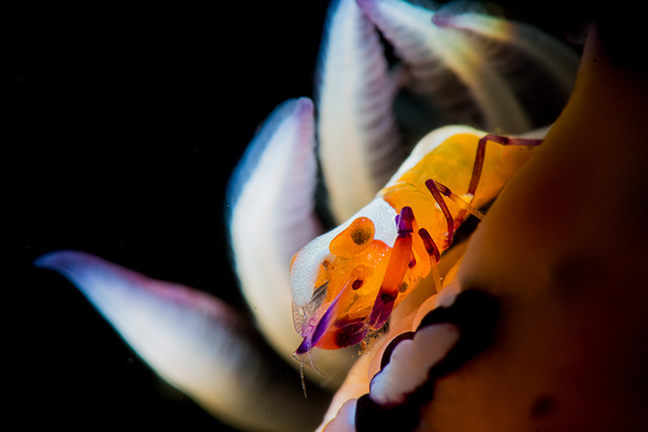
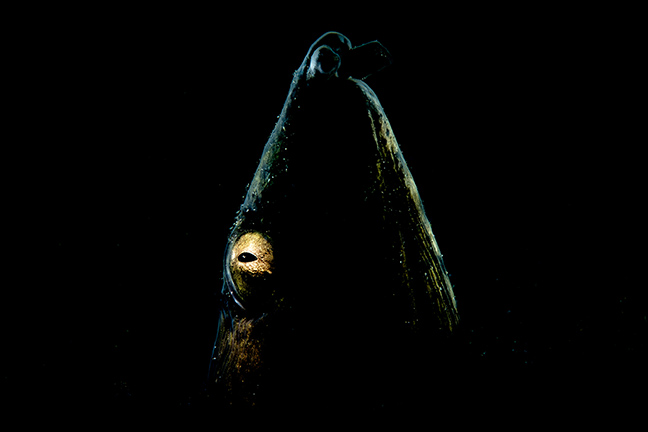
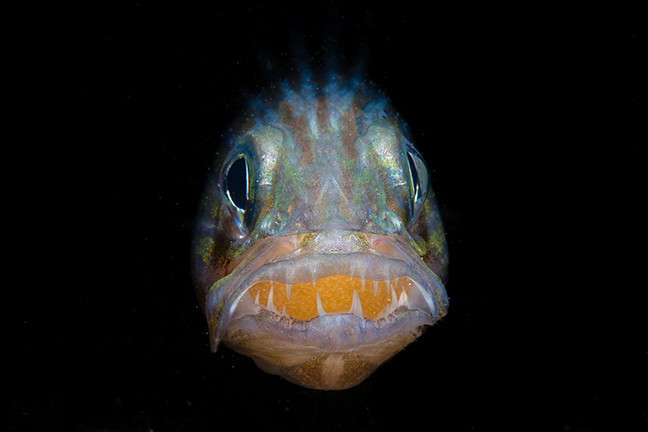
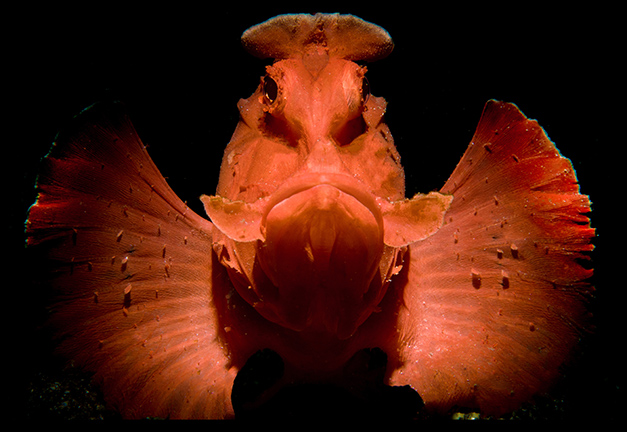
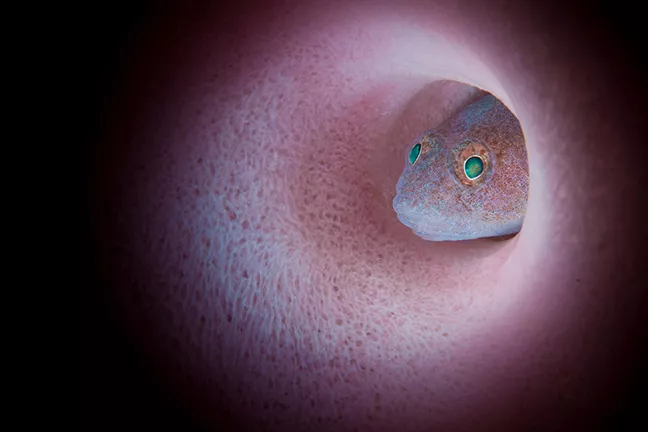
A snoot is a device that is used to control strobe flash in an image. Snoots do not produce light but help to channel the light for dramatic placement and effect. Often times it is not what is in the image with snooting, but what is not in the image. In other words, using a snoot also helps to eliminate a fussy background or confusing substrate by illuminating just your target while the rest of the frame remains dark.
The first things to consider when buying a snoot is not the cost. In fact, if you are worried about dollars spent on camera gear, you have picked up the wrong habit, I mean hobby. Yes, there is a ceiling of return per dollars spent, but do not be shy about spending a few bucks on a device that will actually add chapters to your portfolio. Think of your snoot as you would a new lens. It will actually have that much of an effect on the way you shoot and over your portfolio.
Types of snoots
There are basically two types of snoots on the market: fiber optic snoots, where the base fits over the strobe head and the flash is carried through fiber optic cables; or the optical snoot, which fits over the strobe head, with only a slight diffuser between the strobe flash and the subject.
A few questions I would ask prior to making the buys are:
- Ease of use—is the device easy to put on and take off?
- What is the scope of use—can I shoot with a wider angle of view and super macro?
- Will I be able to operate the device on my own?
- Do I like the quality of light?
Using a snoot is so much more than casting a ring of light around your subject. Using a snoot helps to eliminate a fussy background while delivering light to precisely where you want it.
The challenge of using a fiber optic snoot (or FO snoot), is the inability to see where the snoot will fire prior to releasing the shutter. More recently, some other products have emerged on the market that eliminated this problem by allowing the shooter to use the pilot light on their strobe to aim with. The light-shaping device also makes it possible to change the size and shape of the light pool by using a set of various masks or sliders. Each of these types of devices are useful in their own right; it just depends on the user’s creativity.
There are also different ways of using a snoot that is not just about creating a ring of light around your slug. Once you begin to master the basics of using a snoot, you will find that its use becomes limitless and could provide you with that creative edge you have been looking for.
Mastering the basics before mastering your snoot
The basics for using a snoot can be broken down to a single simple phrase: “controlling the light.” For the best results, use the following settings.
- Jump Settings for using a Snoot:
- ISO-100/Low ISO to control ambient light
- Shutter speed: 1/200 further eliminates ambient light and keeps the image sharp.
- ƒ-stop: ƒ18 and higher controls the color and depth of field, and ultimately, the light quality and light pool.
- Strobe power: 3/4 power. If the strobe power is not strong enough, open the aperture slightly. For super-macro images, increase the ISO from 100 to 360. I do not recommend using your snooted strobe on full power as the strobe head becomes quite hot. Taking a break for a few minutes during intense use will also help the strobe to perform better.
TIP: Use the snoot on the left strobe so that you can make adjustments with your left hand while looking through the viewfinder and adjusting your camera settings with your right hand. Yes, using the snoot off-camera with fiber optic cords is also do-able but will add another dimension of difficulty to a simple shoot.
Nearness to your subject with the snoot tip (FO or Optical) will shrink the pool of light, and as you pull the snoot tip back or away from the subject, the light cast will broaden or get wider. The intensity of the contrast will also change. The optical snoot has a working distance just like a camera lens and is approximately six inches from your subject for the best light quality.
The FO snoot can be used with very close proximity and offers very good light quality. For super-macro shots, I actually prefer to use the FO snoot rather than the optical snoot as it is easier to control after the initial setup is complete.
Final thoughts
The bottom line is that, without a doubt, lighting is everything, when your trying to create an image that pops or stands above. Using a snoot could be the next step for expanding your portfolio, broadening your skill-set and teaching you much about how to control light in ways you never thought possible. Your patience will surely be tried along this challenging path, as is mine. It is a journey of learning and not a destination. Have fun!
")


")