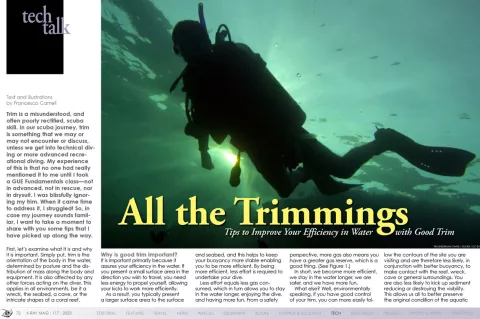
Trim is a misunderstood, and often poorly rectified, scuba skill. In our scuba journey, trim is something that we may or may not encounter or discuss, unless we get into technical diving or more advanced recreational diving. Francesco Cameli offers insight and advice in how to improve your trim and increase your efficiency in the water.

Contributed by
My experience of this is that no one had really mentioned it to me until I took a GUE Fundamentals class—not in advanced, not in rescue, nor in drysuit. I was blissfully ignoring my trim. When it came time to address it, I struggled! So, in case my journey sounds familiar, I want to take a moment to share with you some tips that I have picked up along the way.
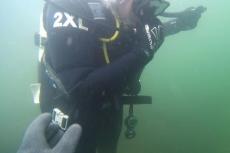
First, let’s examine what it is and why it is important. Simply put, trim is the orientation of the body in the water, determined by posture and the distribution of mass along the body and equipment. It is also affected by any other forces acting on the diver. This applies in all environments, be it a wreck, the seabed, a cave, or the intricate shapes of a coral reef.
Why is good trim important?
It is important primarily because it assures your efficiency in the water. If you present a small surface area in the direction you wish to travel, you need less energy to propel yourself, allowing your kicks to work more efficiently.
As a result, you typically present a larger surface area to the surface and seabed, and this helps to keep your buoyancy more stable enabling you to be more efficient. By being more efficient, less effort is required to undertake your dive.
Less effort equals less gas consumed, which in turn allows you to stay in the water longer, enjoying the dive, and having more fun. From a safety perspective, more gas also means you have a greater gas reserve, which is a good thing. (See Figure 1.)
In short, we become more efficient, we stay in the water longer, we are safer, and we have more fun.
What else? Well, environmentally speaking, if you have good control of your trim, you can more easily follow the contours of the site you are visiting and are therefore less likely, in conjunction with better buoyancy, to make contact with the reef, wreck, cave or general surroundings. You are also less likely to kick up sediment reducing or destroying the visibility. This allows us all to better preserve the original condition of the aquatic realm—A good goal to have on all our dives.
Training
Historically, there were few classes that addressed this skill specifically, but over the years, more and more agencies have turned their attention to teaching their students to achieve better trim and buoyancy control. Some have done better than others. I feel that the agency that I teach for, Global Underwater Explorers (GUE), does a particularly good job of addressing this. Its entry-level Fundamentals class for already certified divers concentrates mainly on buoyancy, trim and propulsion.
“Simple things done very well,” was what my friend, mentor and instructor examiner Guy Shockey once told me.
When I first learnt about the concept, I had somewhat of a physical approach to controlling my trim. Put your body in this position, flex these muscle groups and muscle it in. However, I really struggled and frequently had a sore back from overarching.
Though this method can work for some, it is important to note that, there is much more to it than that, and that diving is supposed to be a pleasurable experience. So, as my own diving progressed and I trained to become a GUE instructor, I became curious as to how to best teach and fix trim. It was in fact not until sometime later when a dear colleague of mine, Steve Millington, pointed out a small trick to me that I was able implement to refine my trim instantly. In time, more and more pieces began to fall into place, and now I have a much deeper understanding of how to diagnose and fix trim in my own students. Thanks, Steve!
A word of warning: Though you can play with some of these concepts yourselves, the best way to better your trim is to spend some time in the water with a GUE instructor so they can observe you, show you video of yourself and, discuss the small details that will help you perfect it and keep it dialled in moving forward. Here, I merely aim to provide some pointers that you can digest and perhaps play with the next time you go diving.
Physicality and physics
When I teach my students, my goal is to help them to trim out with the least amount of physical effort. The first thing I do is to look at the student and approach the problem from a physics standpoint on the principle that all matter must acquiesce to the laws of physics.
I begin outside of the water. What is your build? Are you taller? Smaller? Muscular? Stocky? A sinker or floater? The answers to these questions help suggest an appropriate scuba tank. This is particularly helpful when diving with doubles, as the tanks become a large mass object that you need to balance properly.
I am 6ft, 2in tall so, as much as I like my Worthington HP100s, they are not ideal for my frame, so I choose to dive with HP120s, which are longer. In time, and once you perfect trim, you will be able to dive with anything, but here, we are at the very start of your journey to better trim. Once you have learnt this, being out of trim will simply feel odd and you will automatically correct it.
I can hear some of you now screaming, “Adjust your shoulder straps, dummy!” at the computer screen. Well, yes, you can do that, but remember that we must walk a thin line between lowering our tanks whilst also still being able to reach our valves. For me, 100s would have needed to be so far down my back that valve manipulation would be tricky even though I have good shoulder mobility and reach. Hence, my choice of a longer tank to move some weight backwards. Knowing which way to go with the tanks is also important.
Now, if I loosen the crotch strap on my backplate to help me reach my valves, then I nullify the function of the crotch strap. This is also not ideal.
A tail weight can help some but be careful not to overweight yourself, you want to dive a balanced rig. I find that in some configurations and with no added weight, I am already too heavy. Simply adding weight is not the answer for me. Again, make sure you add weight in the correct place. A diver who trims head up may decide to add weight higher, but this would in fact make the matter worse not better.
The solution lies in balancing, quite literally, plate position, tank choice and reach to valves. Create a well-balanced platform before you even start to move around—Create a state where, if you remain motionless, you neither rotate forward nor backward. (See Figure 3.)
That is only the beginning. It is what we can look at before we enter the water. Once in the water, many other things come into play. Let’s examine some together now.
Your suit
If you are in a drysuit, you must consider the air bubble that exists within your suit. How big is it and where does it reside?
Firstly, if you were taught to use a drysuit for buoyancy, I would urge you to return to using your BCD for this and add just enough air in the suit to make the squeeze comfortable. Then, try not to allow all the gas to pool at your feet, but rather, try to distribute it as evenly as possible in your suit.
Remember, the potential for accumulating a large volume of gas accidentally in a drysuit is much greater than doing so in a wing. This much larger bubble, if untamed, can move around too much, making it hard to control. Remember, we want to be stable, still and relaxed, so we can enjoy the dive, not constantly fight the equipment.
Of course, if you are in a wetsuit, this is a moot point and is one less thing to concern yourself with.
Your fins
Now that you have considered your suit, I invite you to turn your attention to your fins. I have seen many fin sins! Or rather, fins that are not the right choice for the diver’s configuration.
Fins are important because they are at the end of some pretty long levers—your legs. Too light and you cannot use them to your advantage. Too heavy and you are constantly fighting to keep them up.
Again, here you need to find a good compromise that works for you and your overall setup. If you are correctly weighted, in sensible tanks, placed somewhere sensible on your back, then you can really do all the fine adjustments by extending or retracting your arms and legs a little. However, if your starting balance (trim) is off, then you will be fighting this every moment of your dive. That does not make for a pleasant trip under the waves!
Your equipment
Moving other equipment around your body will also have an effect, but for us GUE divers, the equipment configuration is standard, so we have a familiar, fixed starting point.
I am not going to tell you where to put what, but I suggest that if you carry a lot of equipment on a dive, you must consider where you attach it and what potential impact it can have on your balance in the water. To that end, we use a BP and wing because the wing allows us to place gas where it is needed to offset say a deco, stage or pony bottle. This is not really possible with a jacket-style BCD.
All this and we have not even begun to discuss any muscle groups yet. You see, if you get all of the basics right, then trimming out becomes a joy and not a chore. It is a great tool you can use to your advantage on a dive rather than something you must constantly struggle with.
Position in the water
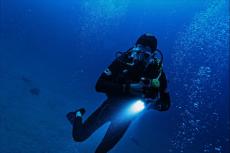
Let us discuss your position in the water. We want you to be as hydrodynamic as you can be in the direction of travel whilst presenting the largest surface area to aid with buoyancy in the up and down directions. If you are in open water, why not trim out to 0 degrees? Whilst swimming over a varied reef, vary your orientation. Indeed, in a fundamentals class, we also teach you to propel yourself backwards efficiently, and so all the same rules as moving forward apply.
How do we achieve this position? By keeping our bodies flat from knees to shoulders. Knees slightly bent, with fins flat to aid with lateral stability. Arms in front of us, head up to see better and a slight arch in our back. To me, all these things should require little to no strain.
Of course, at first this may engage muscle groups that are not used to being engaged. The glutes need to be engaged just enough to keep the knees up, so you do not bend at the hips. (See Figure 4.)
After a short time, this becomes effortless. Holding your head up may also be challenging. I know I had poor neck mobility when I started. In time, this got better, and it also helped my trim and my field of vision. The arching of the back is so you do not slouch or have a rounded back. Do that just enough to keep a straight back but do not overarch.
That was where most of my discomfort came from. I was head-heavy, and to counteract that, I would try to lift my chest and upper body by overarching. Ultimately, that caused substantial back fatigue and was what my initial instructor had missed in his approach to fixing my trim.
One size does not fit all
One size rarely fits all so as instructors, it is in our ability to find these little fixes for the individual that the true expertise lies. Less sergeant major, more curious tinkerer is the approach I now like to take.
Who would have thought that such a simple concept would in fact be relatively complex! I invite you to try some of these tips on your next dives, and if you are still stuck and want to take your diving to the next level, consider taking a GUE Fundamentals class.
I hope I was able to help a little. Happy diving!


")