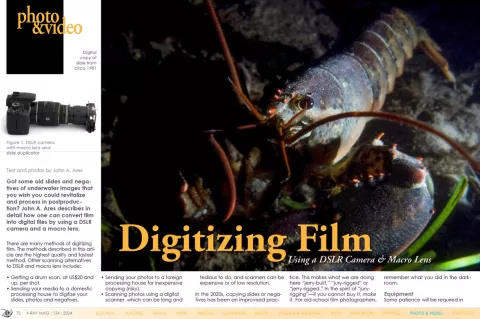
Got some old slides and negatives of underwater images that you wish you could revitalize and process in postproduction? John A. Ares describes in detail how one can convert film into digital files by using a DSLR camera and a macro lens.
Contributed by
There are many methods of digitizing film. The methods described in this article are the highest quality and fastest method. Other scanning alternatives to DSLR and macro lens include:
• Getting a drum scan, at US$20 and up, per shot.
• Sending your media to a domestic processing house to digitize your slides, photos and negatives.
• Sending your photos to a foreign processing house for inexpensive copying (risky).
• Scanning photos using a digital scanner, which can be long and tedious to do, and scanners can be expensive or of low resolution.

In the 2020s, copying slides or negatives has been an improvised practice. This makes what we are doing here “jerry-built,” “jury-rigged” or “jerry-rigged.” In the spirit of “jury-rigging”—if you cannot buy it, make it. For old-school film photographers, remember what you did in the darkroom.
Equipment
Some patience will be required in getting equipment to fit properly, depending on your particular system.
Items needed:
• Digital SLR (DSLR or mirrorless) with a 50-65mm macro lens
• Extension tubes
• Slide copier (non-optical) to hold slides and film (most likely available on Ebay)
• Adapter rings to hold the slide copier to the macro lens
• Strobe with manual control
• Optional remote strobe, with 2 to 3ft extension cord
• Optional negative holder
• Focusing light (small reflector flood light and clamp)
• White flash bounce card or plain white foam-core board
• Dusting supplies, soft brush and air can
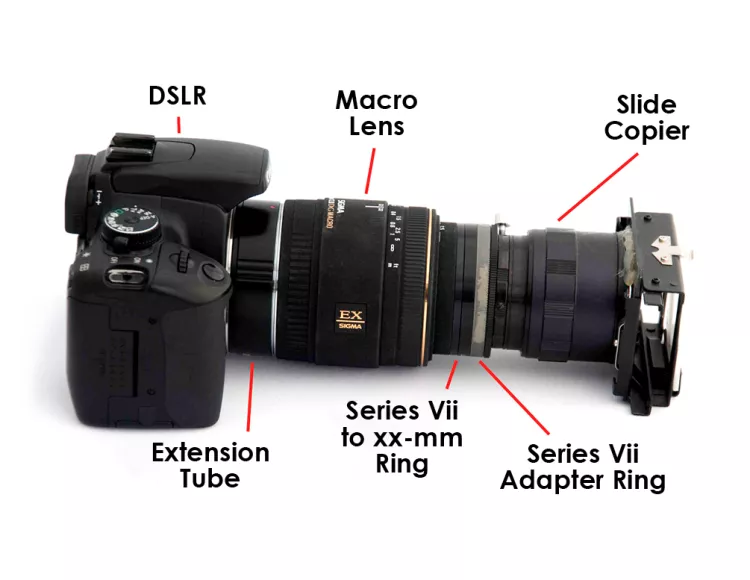
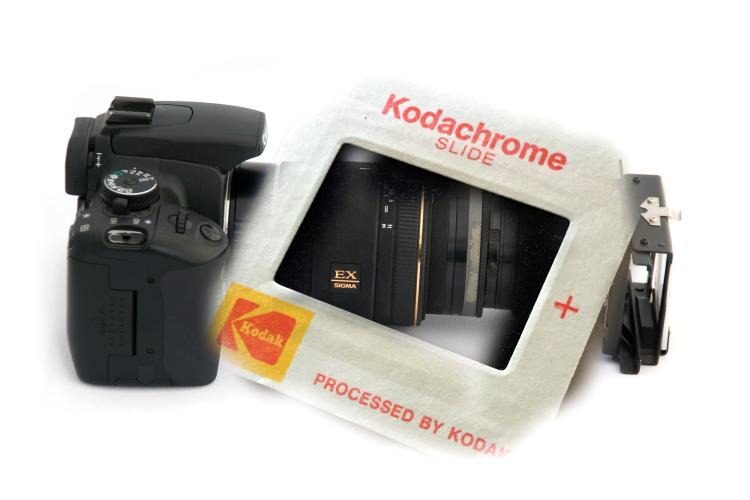
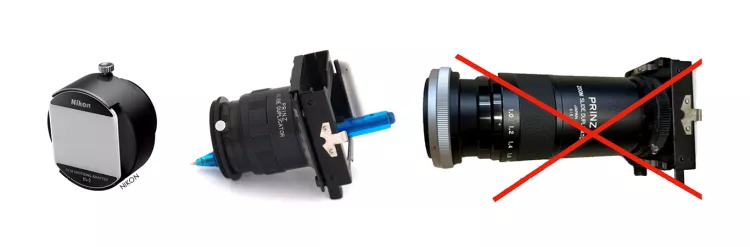
My experience in digitizing slides and negatives is with a Prinz slide duplicator (non-optical). Nikon actually makes a device called the Nikon ES 2 slide copying adapter. This is designed to fit Nikon macro lenses. I have no experience using this adapter; however, it might fit more camera models, as it screws into the lens front like a filter. In addition, it might be simpler to use than the setup that I have assembled (Figures 1 and 2).
Assembly
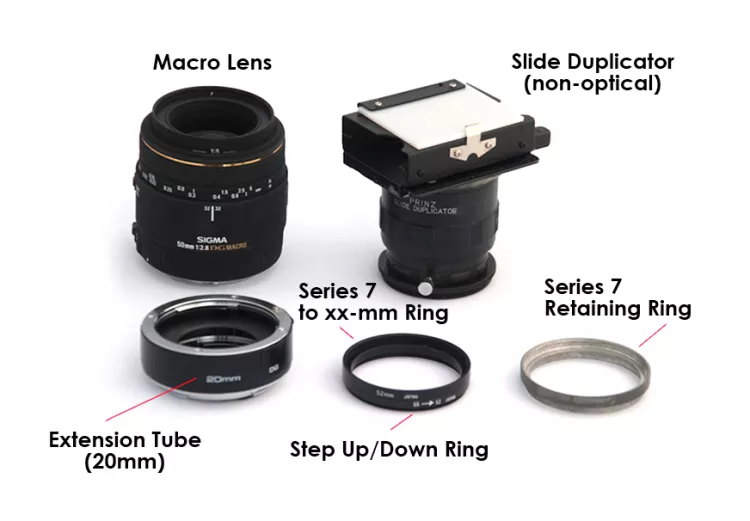
Get a set of extension tubes and experiment with them to find the correct size. I have a set that includes 12mm, 20mm and 36mm tubes. The 20mm tube is the best fit for my APS-C sensor camera. Perhaps the 12mm tube might be a better choice for a full-frame sensor camera. Here, “experimentation” is the word of the day (Figure 3).
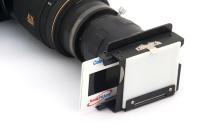
• Prinz slide duplicator (non-optical) (Figure 4, center). Notice the blue pen, which is inserted to demonstrate. There is no glassin the slide copier. The Prinz slide duplicator is a discontinued item; find it on Ebay for US$10-20.

• Alternatively, use a Nikon ES 2 slide copying adapter (Figure 4, left).
PRO TIP: Do not be seduced into buying similar items (Figure 4, right). This item has poor quality glass. Copies will not be sharp. Beware, dozens are on Ebay.
Negative holder (optional)
• Some modification (jury-rigging) may be necessary to fit negatives into the slide copier.
• Some are available on Ebay, but you may need to make a negative holder to stabilize negative strips of up to six negatives. (See the use of thumbtacks on a foam core board in Figure 5.)
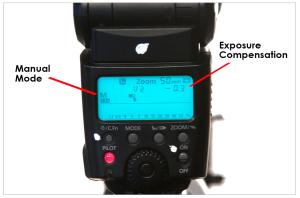
Strobe with manual control
Many brands have manual control. Read your strobe manual to learn how to adjust the exposure compensation if you are not sure how to do it (Figure 6).
Using the focusing light
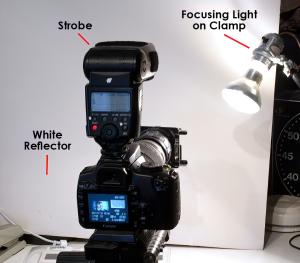
This can be a small reflector floodlamp and clamp (Figure 7).
• It is necessary to allow the camera to focus on the slide or negative.
• Position it in front of the slide copier.
• Beware, the light gets HOT—be aware of the film and nearby flammable materials.
Please note the white flash bounce card in front of the camera (Figure 7).
Alternative method of shooting
If your exposures are not bright enough, you can use the strobe mounted off the camera, facing the macro lens. Connect the strobe to
the camera hot shoe by using a remote cable (2 to 3ft long), dedicated to your camera model (Canon, Nikon, etc). Experiment with the distance between the slide copier and strobe. One to three feet should be sufficient.
Dusting supplies:
• Air can
• Soft camel hairbrush, 1 inch wide
• Optional: White darkroom gloves to prevent fingerprints
Time spent dusting and preparing your slides and film means less dusting in Lightroom or Photoshop.
1. Lightly dust the slide with a brush. Holding the slide/negative firmly, blast both sides with the air can.
2. Insert a slide into the carrier and center it—emulsion side away from the camera.
3. Turn on the focusing light.
4. Extension tube selection (start with 20mm or so). It is trial and error to find the right tube “size” to shoot the full slide.
5. Use auto focus on the lens, because you have shallow depth of field.
6. Use the center focus point—which may need to change, as the camera “searches to focus.” Try selecting “all focus points.” The camera needs to find contrast in order to focus.
7. Using manual focus may be necessary if the camera continues to search to focus after adjusting the focus point.
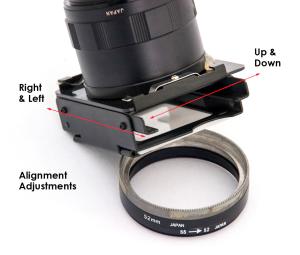
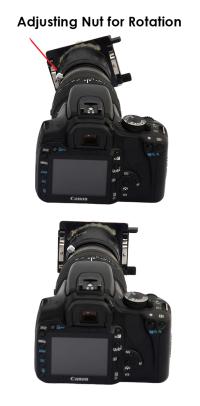
There will be three adjustments to properly align and center slides and negatives in the viewfinder (Figure 8).
Shooting slides
1. Select your slides.
2. Turn on the camera, strobe and focusing light.
3. Dust and insert the slide with emulsion (dull) side facing away from the camera (Figure 9).
4. Assure alignment and focus.
5. Shoot one slide at a time, bracketing exposures (normal exposure, overexposed by one stop, and underexposed by one stop, for a total of three exposures).
6. Check the histogram on the back of the camera.
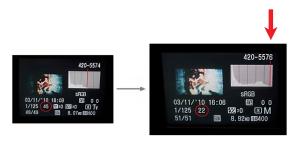
Histogram
• Use Manual mode in the camera and set the shutter speed to 1/125 (approximately).
• Set the strobe to Manual mode.
• Bracket exposures—check the histogram and “expose to the right,” as shown in Figure 10.
Shooting negatives
• Use the same setup as for slides
• Then, insert the negative carrier fully into the copier, and
• Insert negatives, emulsion side away, pinching the film slightly (Figure 11).
Jury-rigging notes
You can make carriers for 120 slides, or other non-35mm slides and negatives, from photo-mounting board.

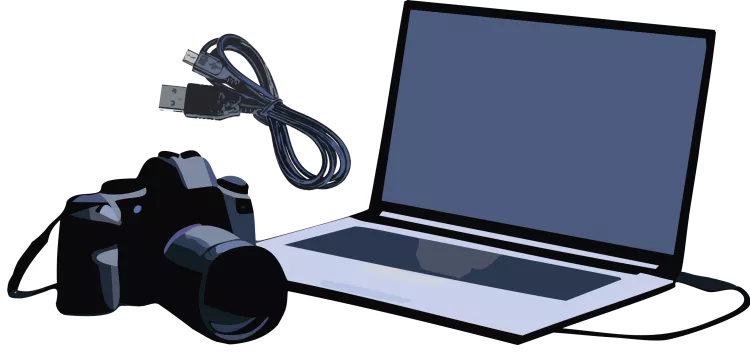
PRO TIP: You can shoot while the camera is “tethered” to your computer, to better check focus, exposure and alignment. Read your camera manual to learn how to do this or do an online search for the procedure for your specific model of camera and computer (See Figure 12).
Final thoughts
Using this method, there is no need to let your slides and negatives sit forgotten in storage. With a minimal amount of trial and error and a bit of ingenuity, you can bring renewed life to your film images by transforming them into digital files, which can then be more readily processed, corrected and cropped in postproduction software applications.


")