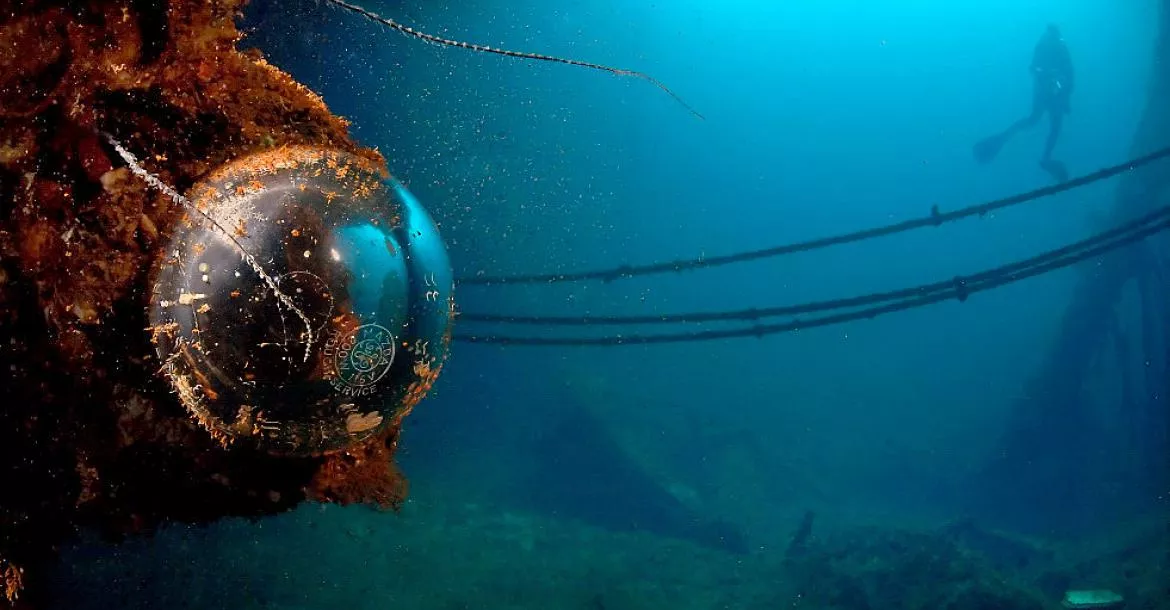
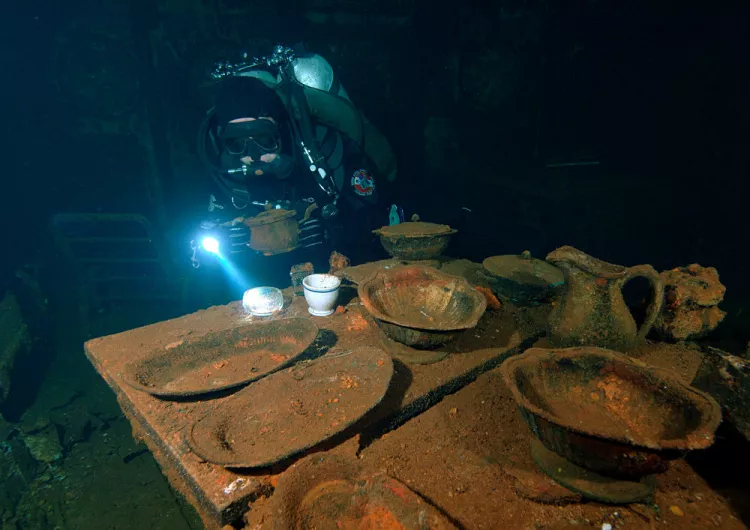
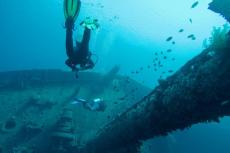
Not all sunken ships are the same. There are shallow wrecks, deep wrecks, very old barely discernable wrecks, wrecks sunk in war, wrecks sunk to make artificial reefs, even wrecks placed on the sea bed for Hollywood movies. While each ship has a different history and characteristics they share one thing in common—they all have been transformed into undersea time capsules.
Contributed by
The ship’s design reflects how life at sea existed in a particular era, and personal effects that went down with them signs a personal signature to those that walked and worked the decks. Even vessels placed intentionally on the bottom as man-made reefs, often have glorious histories contained within their hulls that can be felt by the astute diver during a visit.
As artificial reefs, they tend to attract, and ultimately, possibly sire their own population of critters from encrusting invertebrates to apex predators. Between the assemblage of marine life and the ships themselves there’s no shortage of photographic opportunities. The emphasis of this article will be on bringing back meaningful images from inside the passageways and compartments—AND do it as safe as possible. In no shape or form is this piece intended to be an all-encompassing text on wreck penetration or photography, but merely a primer of some things to think about.
So, you want to crawl inside what’s essentially a submerged man-made cave, place hundreds or thousands of tons of steel over your head, and then work in near total darkness? The absolute first criterion is to evaluate your skill and desire level long before you book that trip. If you do not have the proper training and gear, then entering any overhead environment is foolhardy. Yes, it’s done all the time, and every year the fatality statistics show some a mere portion of the results, as the number of near misses don’t make the list. There is a BIG difference between managed risk and home grown risky behavior.
Preparation
Serious wreck explorers make a substantial investment in education and equipment before making penetrations. They also study maps and drawings of the vessel to learn as much as possible before getting wet. Paying close attention to briefings and soliciting information from others is an integral part of the dive plan.
The immersion calls for strict adherence to bottom times, air consumption rates, desired length of penetration, and most importantly, emergency contingencies. The degree of planning is reflected in their equipment. They carry adequate gas supplies for the objective which usually consists of twin cylinders, but could also be a large capacity single with a smaller tank (sometimes called a pony bottle) for a redundant gas supply held in reserve.
Breathing gas is managed based on consumption rates of those divers making the plunge. The highest breathing rate and decompression obligations of the dive are usually the limiting factors for its duration. One common technique of managing gas supply is called the “rule of thirds.” One third of the available gas is used for entry, one third is used for return, and the last third is held for emergency use only. Redundant regulators, multiple powerful lights, guide reels, computer/bottom timer with backups are also required before every significant penetration.
Adequate cutting tools—at least two, are a must as well. Besides the cables, ropes, lines, etc., that most sunken wrecks are “equipped” with before they are sunk, there most likely will also be a nice selection of fishing line, anchor line, nets, and maybe even diver guide lines left behind by visitors after sinking. A sharp blade for ropes and nylon lines and a pair of shears for cables, wires and other metals need to be added to the wreck diver’s kit.
Technique
Techniques and skill development are as important, if not more so than having the proper gear. Buoyancy and propulsion techniques have to be mastered before swimming inside overhead environments. These two diving inherent skills, while not overly difficult, do require effort and practice. Far too many certified divers, including “advanced” c-card holders, show a lack of ability in this department. Ricocheting off the deck with fins and arms flapping all over the place is not a pretty picture and becomes dangerous quickly in a confined space. Even a small amount of silt kicked up will pretty much negate any chance of capturing good images. The nuances of buoyancy control apply to the entire dive team.
Ideally, you want as horizontal a position as possible without needing to do excessive hand or foot movement to maintain it. This can be achieved through shifting a small portion of ballast weight around the body as needed. For instance, if your feet float, you can shift a couple of pounds to the lower legs with ankle weights. If head up is a problem, you can put a few pounds on the upper portion of the air tank. A combination of BC jacket weight pockets and a belt will also spread some of the weight around. Make sure to pay attention to roll, as a little too much lead or gear on one side or the other can make it very difficult to stay right-side up.
With the plethora of weighting options available to us today it has never been easier to achieve balance in the water. If you can maintain a horizontal position with a foot or two of water beneath you without stirring up or crashing into the bottom, your buoyancy skills are in excellent shape.
Flailing arms and legs are the single biggest enemy of keeping the water clear inside a wreck, so being proficient with your fins is far better if it’s not an afterthought. Large kicking sweeps suitable in open water have no use inside a confined space. A number of other fin movements such as the “modified flutter” work well and still give adequate propulsion. The legs are bent at the knees and only the ankles are used to power the fins, the thighs are kept stationary. Another popular method is the “shuffle kick” where again the knees are bent upward and you use small sideways motions with the calves bringing both legs out and then back in together.
The key is small efficient movement as far away from sediments as possible. Hand movements are also controlled with only gentle minimal sculling or a single finger used to keep balance. Wildly swinging arms will not only dislodge sediment (or a buddy’s mask), but also give you a fairly decent chance of having to rummage through the first aid kit after the dive because of skin to steel impact. The wreck diver’s mantra, indeed every diver’s mantra, should be to keep your hands to yourself and know where your fins are.
Configuration
It is not only the dive kit that needs special attention for penetration but also the camera configuration. Long multiple arm sections on strobes might be great for open water wide-angle but inside a ship they can be grabbier than a drunken frat boy. A single arm on each side works far better. Keeping the strobe arms collapsed parallel with the camera housing body helps to keep a low profile while navigating passageways and hatches.
I find that keeping just enough tension on the flash arm joints to keep them in place works best. This way, it’s a simple matter of pulling them into position and collapsing them again without having to constantly fumble with the ball clamps.
Unless you’re in a very large compartment such as a cargo hold, you’ll generally want the flashes pointed close to 45 degrees, or more, away from the lens direction. Even if you have perfect fining technique there will always be at least some particles forced into the water column.
Ever heard of “thousands of tiny scrubbing bubbles…?” (From an old TV toilet bowl cleaner advert) Well, unless you’re on a closed-circuit rebreather, every exhale is going to send a barrage of “scrubbing bubbles” heading for the overhead and rust, paint chips, silt, and crud is going to come raining down.
The first couple of minutes, or seconds, is when you generally have the clearest water for image-making when first entering a particular section or compartment. This is why you don’t want to waste precious time fumbling with strobe arms just prior to a shot.
For smaller compartments, it sometimes is better to send the model in and then just stick your camera through the hatch and fire away. This method keeps your bubble trail out of the compartment and may buy you a couple of extra frames. Once a section is even partially silted out the game is over.
Lighting
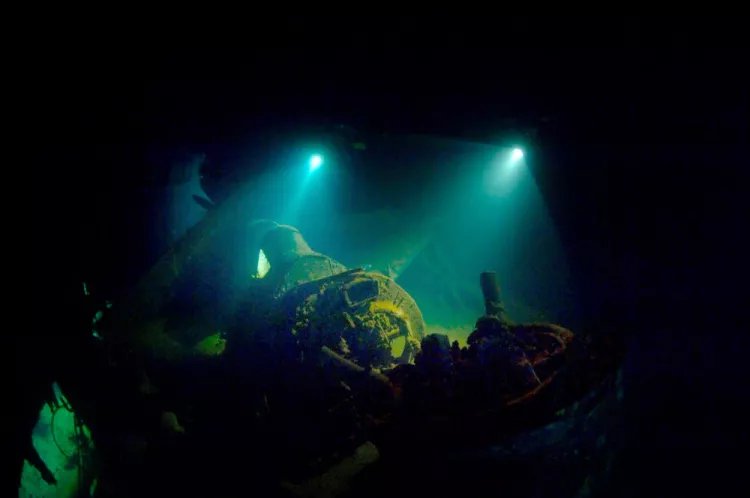
Photographically speaking, lighting is arguably the biggest concern when shooting below decks. While backscatter as mentioned above is a primary problem there are a host of other less obvious illumination issues as well. A full-power strobe blast can ricochet off bulkheads like a Hollywood action movie bullet.
Even the darker rust/silt covered varieties of older ships reflect more than seems reasonable. Newly sunk artificial reef vessels can positively glow. At other times, they soak up light like the office rummy with alcohol at the company Christmas party.
The trick is to try and use the reflective light as an ally when setting up composition and exposure. Direct full lighting with flashes can result in harsh murky hotspots with very dark backgrounds. There is little sense of “being” there as from the perspective of an exploring diver. For example, the image of the hellfighter in the hanger loses much of its mystery when over lit up from multiple high power strobes.
Using only diver HID’s and a touch of ambient light gives the scene a more “realistic” look, as though the viewer is actually on the dive. Admittedly, this takes far more effort and cooperation from your dive buddies to pull off, so make sure you have something to bribe them with.
Using lower output lighting usually means far slower shutter speeds and wider apertures. The new breed of high ISO performing cameras are perfect for this kind of shooting.
Camera stability becomes more of an issue once below 1/30 second give or take. On land, of course, you’d break out the trusty tripod. While tripods can and are used underwater by a number of photographers, they definitely increase the complexity. Taking yet another piece of bulky gear on penetration has to be weighed against the increased hassle factor and risk.
I have used tripods in open water but prefer to try and use naturally existing supports inside of wrecks.
Fortunately, there are often pipes, beams, cabinets, etc., that can be used as an impromptu camera stabilizer. Extreme care must be used manoeuvring around these objects. Besides the obvious potential entanglement issues, all one needs is solid jagged steel contact with the dome port to end that good nitrogen narcosis feeling.
As on land, breathing techniques can help in steadying the camera. Typically, some version of holding your breath is used just before pressing the shutter release. For a variety of reasons, I try to avoid doing this underwater, especially on decompression dives. When I’m doing things right my breathing rate is slow and steady with deep inhales and slow extended exhales. During the last second or two of my exhalation, I try to be in a position to take advantage of the “natural” interval before taking my next breath.
While this takes a little practice, the method works quite well and becomes second nature in no time. The trick is to let the time gap between breaths be conducive to one’s own breathing cycle and not consciously extended (that’s holding your breath) to get that extra time delay.
Using strictly natural available light usually means having a port, hatch, torpedo hole, or some other opening letting in the sun. This kind of illumination can make for very dramatic images. Mostly, this means silhouettes, but by adding a touch of flash and letting the ambient light “take over”, the exposure you can create an ethereal quality to the photo.
When I shot film my wastebasket tended to fill with slides of ambient-light-take-over accidents. With the immediate feedback of digital, it has become easier to fine-tune just the right amount of overexposure for the look you want.
Available light is also the king of black and white shooting. The high contrast ranges can make for very effective greyscale images. Again, with the versatility of digital, you can visualize for both colour and black and white on the same dive with just one camera.
Most image makers I know shoot in colour and then convert later on the computer. Better black and white images are generally of higher contrast and strong shapes but don’t ignore the mysterious look of muted greys and dark contours that shipwrecks can provide.
Models
Working with models below decks takes very good communication that starts well before anybody starts blowing bubbles. Underwater instructions must be clear and simple. Often the best outcome requires multiple dives in the same area to figure out the best way to accomplish the task. When that isn’t possible, learning as much as possible about what to expect from someone else who’s been inside is quite useful. And an experienced professional guide is invaluable.
Once you’ve formulated an idea, make sure to talk to your model(s) in enough detail so they won’t have to second guess you down below. Ad-libbing during a penetration dive is NOT a good idea, for no photo is worth jeopardizing the safety of the dive team.
Taking the images have to be secondary to all else of the dive exploration. Keep in mind when working with people in overhead situations that they are already task loaded. Avoid hitting them with point-blank high power strobe blasts. Watch your own fins. Pay attention to time, depth, and other dive requirements. You can often let some of these parameters slide in open water but not here.
Wearing some kind of colour on the model really helps with separating them from the dark background. Lively fins, mask, and gloves are a big help as are red and yellow BC’s. They don’t have to be gaudy but having something other than light sucking black makes for a brighter image.
And make sure to let the model dive.
A wreck explorer is always in some kind of action, albeit slowly. Static looking divers staring at the camera rarely exude the excitement of adventurers. Pulling an artefact from the muck or showing a perfect fining technique through a silted out compartment can help share some of the thrill.
To be sure, the “keeper” rate is low shooting in this environment. There is an increased risk for both you and your equipment. Finding buddies who’ll put up with your crazy filming ideas are hard to come by. And there are more than enough challenges for all who venture inside, but the chances for some unique images are definitely under all that steel.
Joseph Dovala is an internationally published dive writer and photographer with a background in the U.S. Coast Guard, ocean technology and molecular biology. For more information, visit: www.jcdovala.com ■
Published in
-
X-Ray Mag #40
- Läs mer om X-Ray Mag #40
- Log in to post comments

